Creating Depth of Field in your photos

One the most fundamental techniques necessary to really to master creative photography is depth of field. It was always a bit of a mystery to me because of the link to aperture and understanding all those back to front f-numbers. I think it was more of a mental block, though, because it’s actually quite easy to grasp.

Creatively you are able to do more with your photography and as you learn digital photography you will find using depth of field key to great images. You can use it to blur out backgrounds while the subject remains pin sharp or to create an image perfectly in focus from front to back, as in great landscape photos.

1. What is depth of field?

It’s quite simple. It’s the amount of a scene that is in focus in front of your point of focus or behind it. Depth of field is more simply understood as depth of focus: how much of the image is in focus. A lens can only focus at one point which is the sharpest, most in focus point in the photo. But what you can do by using depth of field is to control the perceived zone of focus. This will differ when shooting different subjects or scenes.

Now, there are three main factors that affect depth of field. Firstly, the aperture you are using, secondly the focal length of the lens, and thirdly the focusing distance. All of these will impact the depth of field. Each of these will affect depth of field, so in order to control it effectively it’s necessary to master each one of them.

2. Focal length

When shooting an image using a 28mm wide angle lens at, say, f/5.6 you will see a much greater depth of field as compared to a 400mm at the same aperture. When using different lenses understand what the impact will be so that you can creatively use the resulting depth of field.

3. Aperture

On a lens you have possible apertures ranging from f/1.2 all the way up to f/32, and each of these lens openings will have an effect on depth of field. If shooting on the extremes, like f/32, you’ll find that it results in quite a considerable difference than when you shoot at f/2.8. Then when shooting using the mid-range numbers the depth of field will again be different. An aperture of f/2.8 will have a very shallow depth of field while f/32 will show sharp focus throughout the whole image.

4. Focusing distance

How far you are to the point of focus is another factor to consider. When using any lens, the depth of field will increase the further the focusing distance. If you focus on an object three meters away, and if you focus on something 300 meters in the distance, the depth of field will be greater. So in other words, when the subject is far away from the camera there will be a greater depth of field and more of the image will be in focus.

5. When to use depth of field

Most of us have taken landscape images where most of the scene is in focus. This is true when you’re shooting scenes of fields and trees and boats on the sea. The way in which this is achieved is by setting your aperture to a higher number, e.g. f/11 and above, which means a smaller aperture opening. Virtually the whole scene from foreground to background is in focus. But this changes when choosing a wider aperture opening or a small f-number on the lens. Here you would only use this setting to shoot something you want to isolate such as a face in a portrait. The background gets blurred out and the face is in crisp focus. You would also use this when shooting close-ups of flowers or animals in a zoo where you don’t want to see the background or the bars or fence in the foreground.

So, as you can see, depth of field is really quite simple. Blurred out backgrounds use a large aperture and landscapes that need to be in focus from foreground all the way through to the background use a small aperture. The key as you learn digital photography is to experiment with all settings and then practice, practice, practice!

The Golden Ratio Applied to Photographic Composition

If you have been using The Rule of Thirds in your photographic compositions, you may have discovered an inherent shortcoming. Composing for the Rule of Thirds involves lining up a subject with one of the recommended intersections or lines. This can sometimes result in the subject being crowded too close to the edge of the frame.

The problem can be minimized, if not eliminated using the Golden Ratio Grid, rather than the standard equally spaced Rule of Thirds grid.

What is the Golden Ratio?

It is worth while taking a look at what the Golden Ratio is before applying it. The concept was discussed as far back as 300BC as being mathematically interesting, and in addition to being called the Golden Ratio it is also referred to as the Golden Mean or Divine Proportion.

In simple terms, it refers to two measurements where the ratio of the sum of both measurements and the largest measurement is the same as the ratio of the largest and the smallest. In other words a + b / a is the same as a / b. This ratio is 1 to 1.618 and is often quoted to be found in nature, architecture, art and music amongst other things.

The mathematics of the Golden Ratio was further explored by a man called Fibonacci to deliver the Fibonacci Sequence of numbers. Start with 0 and 1 then progressively add the previous two numbers together to obtain the next. The sequence would progress as 0, 1, 1, 2, 3, 5, 8, 13, 21, 34, 55, and so on. The interesting thing is that the further the progression advances, the closer to the golden ratio becomes the result of dividing the next to the last number in sequence by the last number in sequence. For example, 55/34 is 1.617647…, and the result of 233/144 is 1.618055…

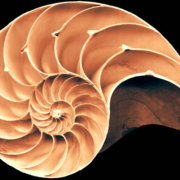
This sequence is used to generate another composition variation called the Golden Spiral. There are opinions that this spiral can be seen in a Nautilus shell, the seeds on a pine cone, and even the arms of the milky way. Such is the interest in the Golden Ratio that many regard it as the universal constant that all things in life relate to in one way or another.

How Do You Apply the Golden Ratio to Your Photos?

One simple way to apply the Golden Ratio is to apply it to a rule of thirds grid. But, instead of the three columns and rows being of equal width and height, the center column and row is 0.618 the measurement of the other two. If you place a subject at a row/column intersection now, you effectively move the subject further from the edge of the image frame, giving the subject more space.

You can also employ the Golden Spiral to place the main point of interest within the inside of the spiral. The spiral is created from the Fibonacci sequence, which when plotted as a series of Golden Rectangles with a series of arcs drawn within the rectangles, results in the spiral overlay. You can see this graphically represented on my website.  Adobe Lightroom provides composition overlays for the Golden Ratio grid and for the Golden Spiral.

Using Color to Create Strong Photo Compositions

Color is one of the most obvious elements of composition. Everyone knows that intense colors make people take notice of your images. Ever wonder why there are so many sunset and flower shots? Color is the reason.

Color has a couple of functions in photographs. First, color grabs the attention of the viewer. Perhaps, because this function of color is so palpable, many photographers miss the more sophisticated, and in some cases far more powerful, function of color: color sets the mood of an image. Since color is such an important compositional ingredient, the experienced photographer will want to use color to its fullest extend — incorporating both functions of color into images.

Grabbing the Viewer’s Attention

Utilizing color to grab attention is often rather straight forward. Generally, what is required is a saturated or intense color. This type of color tends to grab the viewer’s attention and focus it on the area of color. Furthermore, the color tends to keep the viewer’s attention for an extended period of time. When the viewer’s eyes do wander, the color tends to bring the attention back.

There are a couple of primary ways to use color to grab a viewer’s attention. The first way is to use very saturated, bold colors. An example of this approach would be a dramatic sunset. The second way of using color to grab a viewer’s attention is to use a mix of contrasting colors. An example of this approach would be an image of fall colors where there is a combination of red, orange, and yellow leaves.

Mood

Setting the mood through the use of color tends to be a more subtle application of color than when color is used to grab the attention. However, that does not mean that it is any less powerful.

Different colors elicit different moods. Since there are a huge number of colors, it is not possible to cover all of the colors and their impacts on viewers’ moods in an article such as this one. Instead, a few colors will be reviewed in an effort to convey how colors affect viewers’ feelings.

Blue

Blue tends to bring forth feelings of calm or cold depending on how the color is used. This is a reflection of how we perceive the color in nature: the deep calm ocean is blue, peaceful cloudless skies are blue, and large amounts of ice have a blue tint. Therefore, a photographer that wishes to create a feeling of calm in an image should include blue objects in the image such as a peaceful blue stream or a blue lake.

Green

Green often communicates a feeling of lushness and freshness. Again, our feelings about this color are tied up with how we frequently experience that color in nature. We tend to associate green with spring and new growth. Green is frequently used in landscape photography. Green meadows, plants, and fields can be used to convey the mood of a flourishing scene.

Yellow, Orange, and Red

The last colors to be evaluated are the warm tones: yellow, orange, and red. These colors are associated with feelings of warmth and comfort (again the colors are tied to how we experience them in nature). Sunsets are a perfect example of how these warm colors create a comfortable feeling. Photographers that wish to take advantage of these colors can include, in their photographs, objects such as flowers, plants, food, and rocks that contain these colors.

Light

So far, we have looked at using color to create mood in photographs by means of including objects, with the appropriate colors, in an image. However, there is another way to use color to create mood in an image – the use of light. Early morning and evening provide a photographer with colored light which can be used to powerful effect in images. Before sunrise and about twenty minutes after sunset, everything is bathed in a soft blue light. This light can be used to create a calm mood such as an early morning shot of a beach bathed in the cool, blue light.

Just after sunrise and before sunset, the light is often very warm with red, orange, or yellow hues. This light can be used to create feelings of comfort such as a beautiful mountain peak bathed in a soft, warm, golden light.

Summary

When properly utilized, color can be one of the most effective methods of conveying mood in an image.

Dive in Low light & Time Lapse photography

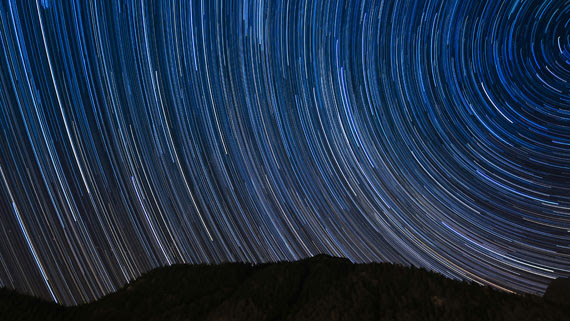
Timelapse photography is an awe-inspiring technique that compresses hours of footage into just a few seconds, revealing the subtle beauty of slow-moving changes. Whether it’s clouds scudding across a blue sky, a bustling cityscape, or a blooming flower, timelapse allows photographers to capture the dynamics of scenes that would otherwise be too subtle for the naked eye. In this post, we’ll explore the essentials of timelapse photography, providing you with the knowledge to start capturing your own stunning timelapse videos.

What is Timelapse Photography?

Timelapse photography involves taking a series of photos at regular intervals and combining them into a seamless video. By speeding up time, timelapse photography can turn seemingly mundane scenes into captivating sequences.

Equipment You’ll Need

  1. Camera: Any camera that has a manual mode and can shoot in RAW will work well. DSLRs and mirrorless cameras are popular choices due to their high-quality sensors and versatility.
  2. Tripod: Stability is key in timelapse photography. A sturdy tripod will ensure your camera stays immobile during the shoot.
  3. Intervalometer: This device or camera feature allows you to program the shooting intervals. Some cameras have built-in intervalometers, but external ones offer more flexibility and reliability.
  4. Memory Card: Since timelapse photography involves taking a large number of photos, a high-capacity memory card is essential.
    Extra Batteries: Running out of battery during a shoot can ruin your timelapse, so having extra batteries on hand is crucial.

Setting Up Your Shoot

1. Choosing a Subject

Pick a dynamic subject that changes over time, like a sunset, a busy pedestrian area, or changing weather patterns.

2. Framing Your Shot

Compose your shot as you would any other photograph. Remember, though, you’re capturing movement over time, so anticipate how elements might move within the frame.

3. Setting Intervals

The interval between shots depends on the speed of the subject’s movement. Faster movements (like clouds on a windy day) might require shorter intervals (e.g., 2-5 seconds), whereas slower movements (like shadows moving across a building) can use longer intervals (e.g., 30 seconds to 1 minute).

4. Manual Settings

Set your camera to manual mode to keep exposure consistent throughout the shoot. Aperture, shutter speed, and ISO should be manually adjusted based on the lighting conditions and desired effect.

Shooting and Post-Processing

Shooting

Start your intervalometer and let your camera do the work. Monitoring the process is crucial, especially for long-duration shoots, to ensure everything operates smoothly.

Post-Processing

Once you have your series of images, you can use software like Adobe Lightroom and LRTimelapse to edit and stitch your photos into a timelapse video. Post-processing allows you to adjust exposure, color balance, and other elements to ensure a consistent look across all frames.

Tips for Success

  • Weather Check: Always check the weather forecast before heading out. Unexpected weather can not only ruin your shoot but also damage your equipment.
  • Golden Hours: Shooting during sunrise or sunset provides beautiful lighting conditions and adds dramatic effects to your timelapse.
  • Experiment: Don’t be afraid to experiment with different intervals, settings, and subjects. Each location and subject will require a unique approach.

Timelapse photography is not just about capturing stunning videos; it’s about viewing the world in a new way. With patience and practice, you can unveil the hidden patterns of nature and human life, providing a mesmerizing perspective on the world around us. Happy shooting!


Rembrandt Lighting: Creating Mood & Depth in Portraits

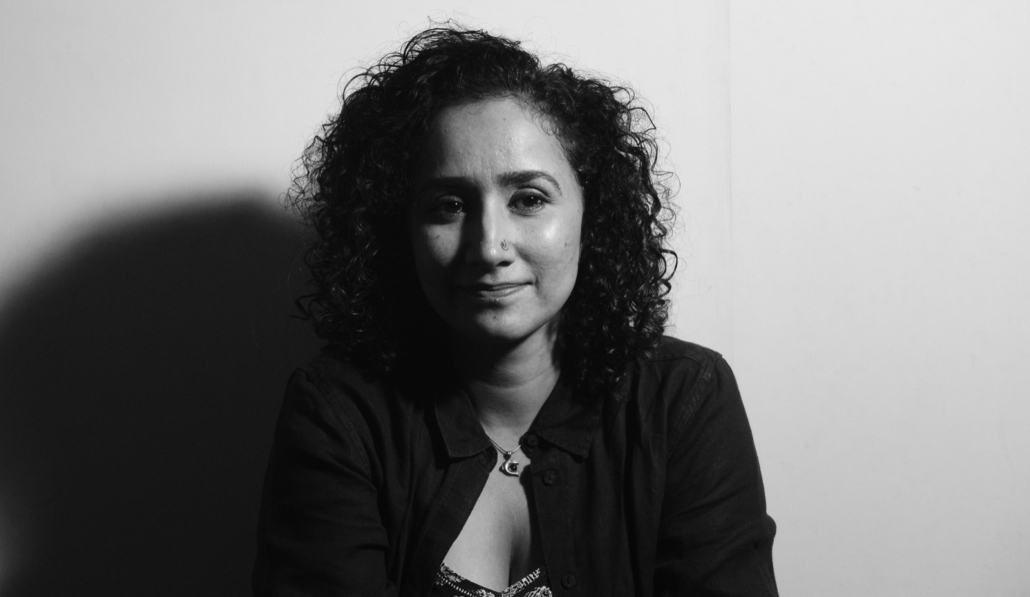
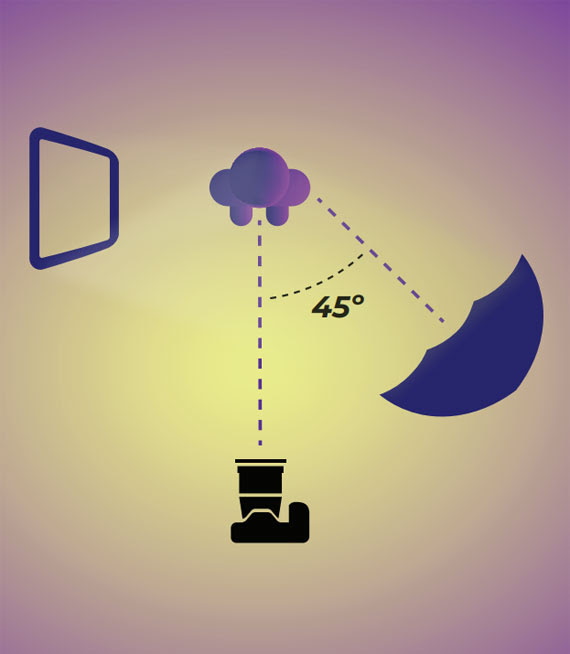
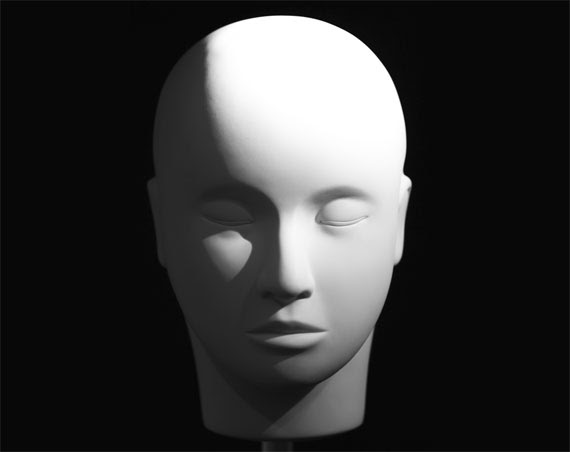
Rembrandt lighting, named after the famous Dutch painter Rembrandt Harmenszoon van Rijn, is a popular lighting technique used in photography and cinematography to create a dramatic effect that draws attention to the subject’s features. This technique is characterized by an illuminated triangle under the eye of the subject, on the less illuminated side of the face. This lighting style emphasizes depth and dimension, making it a favorite among portrait photographers.

Why Use Rembrandt Lighting?

The allure of Rembrandt lighting lies in its ability to add a sense of volume and drama to a portrait. It enhances the facial features and brings a sculptural quality to the photograph. This technique is particularly useful for creating moody and evocative images that convey emotion and character, making it ideal for artistic portraits, actor headshots, and even moody fashion photography.

Setting Up Rembrandt Lighting

To achieve Rembrandt lighting, you’ll need to follow these steps:

  1. Light Source: Begin with a single light source, such as a strobe or continuous light. The key is to use a light modifier like a softbox or an umbrella to soften the light, reducing harsh shadows.
  2. Positioning the Light: Place the light at a 45-degree angle from the subject, slightly above the head level, so that the light points down towards the face. This angle is crucial as it determines the shape and presence of the characteristic triangle of light.
  3. Adjust the Subject: Have the subject turn their face away from the light until the shadow of the nose and cheek meets to form a small triangle of light on the cheek opposite the light source. This triangle should not be larger than the eye and no longer than the nose.
  4. Experiment with Modifiers: Utilizing different modifiers can alter the softness and spread of the light. Experiment with reflectors to fill in shadows mildly, which can be particularly useful in softening the contrast for female portraits or commercial shots.

Visual Examples and Their Analysis

When examining photographs that utilize Rembrandt lighting, you’ll notice the play of light and shadow creates a compelling visual narrative. For instance, a portrait with Rembrandt lighting can highlight the rugged features of a male subject or the gentle curves of a female subject’s face, adding layers of depth and emotion to the image.

Common Mistakes to Avoid

  • Overexposing the lit side of the face, which can lead to loss of detail.
  • Underexposing the shadow side, which might bury essential facial features in darkness.
  • Misplacing the light, which fails to form the triangular highlight and loses the effect.

Applications in Different Photography Genres

While traditionally used in portraits, Rembrandt lighting can also be adapted for use in various other genres like fashion photography, where it can add a dramatic flair, or in product photography, where it can enhance texture and contrast.

Rembrandt lighting is more than just a technical skill; it’s a creative tool that allows photographers to explore the interplay between light and shadow. By mastering this technique, photographers can elevate their portraits, capturing not just images, but stories and emotions. Whether you’re a budding photographer or a seasoned professional, incorporating Rembrandt lighting into your photographic repertoire can significantly impact your visual storytelling.