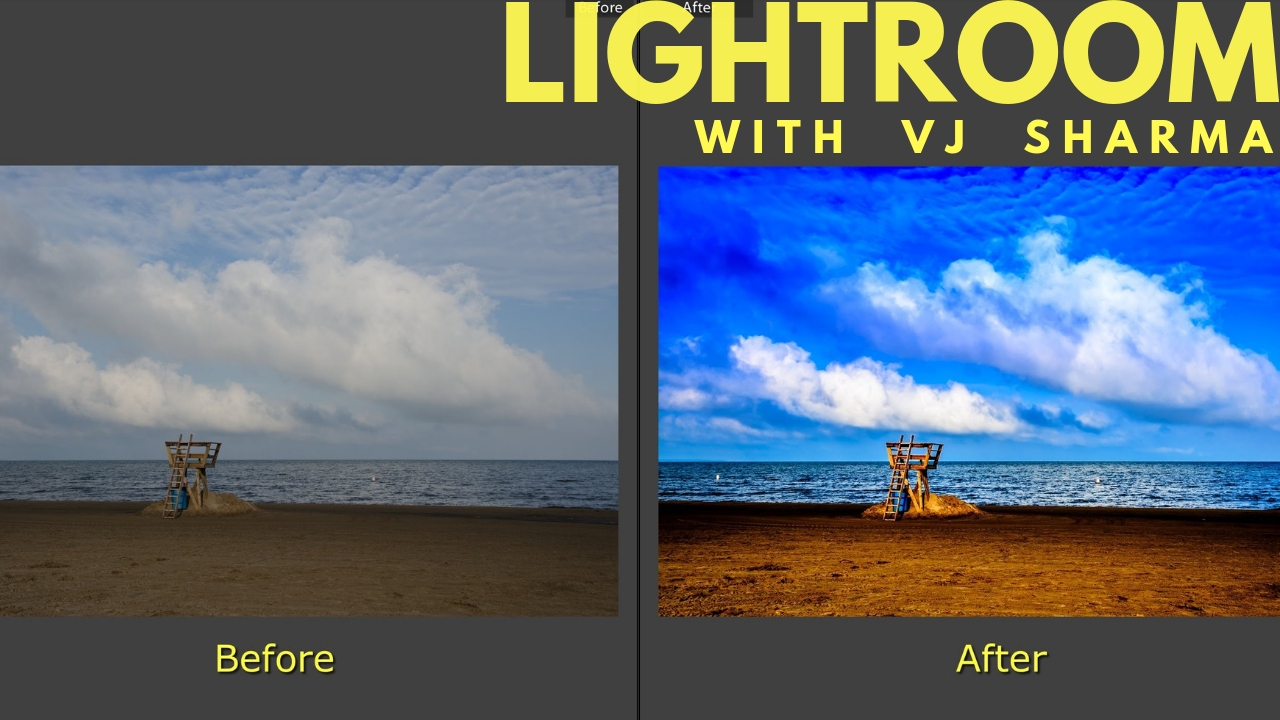
Tips for Using Shadows in Photography

Photographers tend to pay a lot of attention to light. In fact, we often think of light as one of the most important aspects of photography. On the other hand, shadows may seem to be less important – simply a lack of light. This would be a major mistake — for light is nothing without shadows.

Shadows are not simply a dark mass that borders the light. Rather, shadows are an entity as alive as the light. It is the shadows that shape the light, draw attention to the light, and integrate with the light to produce striking photographic opportunities. If we are to reach our full potential as photographers, we must think as much in terms of mastering the shadows as we do of mastering the light. This article details five uses of shadows in creating dynamic photos.

  • Contrast and Drama
  • Focus
  • Directing the Attention
  • Revealing Form
  • Revealing Texture
Contrast and Drama

One of the most powerful uses of shadows is for the creation of contrast to produce a dramatic effect. People’s attention is automatically drawn to areas of high tonal contrast. However, tonal contrast can not occur without shadows. Thus, it is the interplay of light and shadows that creates the attention grabbing contrast. An example of this use of shadows would be a dramatic sunset where the sun punches through gaps in the clouds creating areas of light which are surrounded by dark areas where the cloud cover is heavy.

Focus

Shadows can be effectively used to focus a viewer’s attention. The shadows help focus the viewer’s attention by removing detail from the less important parts of the image. An example of this would be a dramatic portrait that uses light to illuminate the eyes of the subject but allows the rest of the face to fall into deep shadow. The shadow would help to hide the detail of the face. Thus, the viewer’s attention would be drawn to the eyes of the subject.

Directing the Attention

Shadows can be used to direct the viewer’s attention. This is because shadows often have a shape. When a shaped shadow points to the center of interest in a photo, the shadow will direct the viewer’s attention to the center of interest. Conversely, the shadows can surround an area of light that points to the center of interest. In either case, the photo is strengthened as the center of interest is reinforced by the use of shadow.

Revealing Form

One of the most common uses of shadows is for revealing form. This often involves the sun, at a low angle to the horizon, casting long shadows across the terrain. Any irregularities in the shape of the subject or terrain will be magnified. An example of this use of shadow would be a low sun casting long shadows across sand dunes just before sunset.

Revealing Texture

Similar to revealing form, shadows can be used to reveal texture. Again, this often involves the sun, at a low angle to the horizon, casting shadows across the subject or terrain. The main difference is that the photographer moves in close to emphasize the texture of an object rather that the form. An example of using shadows to reveal texture would be using setting sun to emphasize the ripples in the sand of a beach.

Summary

Photographers are often urged to learn to read the light. However, reading the light is only half the challenge — one must also learn to read the shadows.

Dive in Low light & Time Lapse photography

Timelapse photography is an awe-inspiring technique that compresses hours of footage into just a few seconds, revealing the subtle beauty of slow-moving changes. Whether it’s clouds scudding across a blue sky, a bustling cityscape, or a blooming flower, timelapse allows photographers to capture the dynamics of scenes that would otherwise be too subtle for the naked eye. In this post, we’ll explore the essentials of timelapse photography, providing you with the knowledge to start capturing your own stunning timelapse videos.
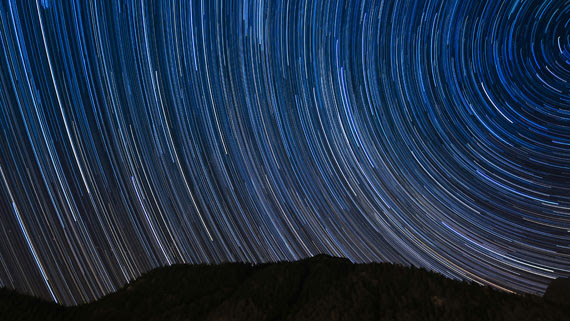
What is Timelapse Photography?

Timelapse photography involves taking a series of photos at regular intervals and combining them into a seamless video. By speeding up time, timelapse photography can turn seemingly mundane scenes into captivating sequences.

Equipment You’ll Need

  1. Camera: Any camera that has a manual mode and can shoot in RAW will work well. DSLRs and mirrorless cameras are popular choices due to their high-quality sensors and versatility.
  2. Tripod: Stability is key in timelapse photography. A sturdy tripod will ensure your camera stays immobile during the shoot.
  3. Intervalometer: This device or camera feature allows you to program the shooting intervals. Some cameras have built-in intervalometers, but external ones offer more flexibility and reliability.
  4. Memory Card: Since timelapse photography involves taking a large number of photos, a high-capacity memory card is essential.
    Extra Batteries: Running out of battery during a shoot can ruin your timelapse, so having extra batteries on hand is crucial.

Setting Up Your Shoot

1. Choosing a Subject

Pick a dynamic subject that changes over time, like a sunset, a busy pedestrian area, or changing weather patterns.

2. Framing Your Shot

Compose your shot as you would any other photograph. Remember, though, you’re capturing movement over time, so anticipate how elements might move within the frame.

3. Setting Intervals

The interval between shots depends on the speed of the subject’s movement. Faster movements (like clouds on a windy day) might require shorter intervals (e.g., 2-5 seconds), whereas slower movements (like shadows moving across a building) can use longer intervals (e.g., 30 seconds to 1 minute).

4. Manual Settings

Set your camera to manual mode to keep exposure consistent throughout the shoot. Aperture, shutter speed, and ISO should be manually adjusted based on the lighting conditions and desired effect.

Shooting and Post-Processing

Shooting

Start your intervalometer and let your camera do the work. Monitoring the process is crucial, especially for long-duration shoots, to ensure everything operates smoothly.

Post-Processing

Once you have your series of images, you can use software like Adobe Lightroom and LRTimelapse to edit and stitch your photos into a timelapse video. Post-processing allows you to adjust exposure, color balance, and other elements to ensure a consistent look across all frames.

Tips for Success

  • Weather Check: Always check the weather forecast before heading out. Unexpected weather can not only ruin your shoot but also damage your equipment.
  • Golden Hours: Shooting during sunrise or sunset provides beautiful lighting conditions and adds dramatic effects to your timelapse.
  • Experiment: Don’t be afraid to experiment with different intervals, settings, and subjects. Each location and subject will require a unique approach.

Timelapse photography is not just about capturing stunning videos; it’s about viewing the world in a new way. With patience and practice, you can unveil the hidden patterns of nature and human life, providing a mesmerizing perspective on the world around us. Happy shooting!


Exploring the Depths: The Fascinating World of Underwater Photography

Underwater photography is a captivating and exhilarating genre that allows photographers
to dive into a whole new world of visual possibilities. From vibrant coral reefs teeming
with colorful marine life to mesmerizing seascapes, the underwater realm offers endless
opportunities for creativity and exploration. In this article, we will take a plunge into the

fascinating world of underwater photography and delve into the techniques and
considerations that can help you capture stunning images beneath the waves.

One of the first and most important aspects of underwater photography is having the right
equipment. Investing in a reliable underwater camera housing or a waterproof camera
is essential to protect your gear from water damage. Make sure the housing is suitable
for the depths you plan to explore. Additionally, consider using wide-angle lenses to
capture expansive underwater scenes or macro lenses to capture intricate details of
smaller subjects.

Lighting is a critical factor in underwater photography, as the properties of light change as
you descend into the depths. The colors become less vibrant and red wavelengths are
absorbed more quickly. To counteract this, you can use artificial lighting sources such as
strobes or underwater flashes. These help restore the colors and illuminate your
subjects, bringing them to life in your images. Experiment with different angles and
intensities of light to create stunning visual effects and add depth to your photographs.

Composition plays a vital role in creating captivating underwater images. The same
principles that apply to composition in other genres of photography can be applied
underwater as well. Utilize the rule of thirds, leading lines, and framing techniques to
create visually engaging and balanced compositions. Experiment with angles and
perspectives to add depth and interest to your shots. The buoyancy of water allows you
to move freely, so take advantage of this to find unique viewpoints and capture dynamic
images.

Mastering buoyancy is a skill that can greatly enhance your underwater photography. Being
neutrally buoyant allows you to effortlessly maneuver and position yourself for the best
shots. Practice controlling your buoyancy to achieve the desired position and angle,
enabling you to capture stable and sharp images. This also helps minimize disturbance
to the marine environment and ensures you can navigate safely underwater.

When it comes to subject selection, the underwater world offers an abundance of
captivating options. Vibrant coral reefs, schools of fish, and unique sea creatures are just
a few examples of the diverse marine life you may encounter. Research your diving
location beforehand to identify potential subjects of interest. Exercise patience and
observation to capture elusive moments and behaviors in their natural habitat.

Post-processing is an essential part of underwater photography. Adjustments to color
balance, contrast, and saturation can help bring out the true colors of the underwater

world and correct any color casts caused by the water. Utilize editing tools to remove
backscatter, which are tiny particles suspended in the water that can appear as
unwanted specks in your images. Enhance the overall clarity and sharpness to showcase
the intricate details of your underwater subjects.

Lastly, always prioritize safety when engaging in underwater photography. Follow proper
diving protocols, familiarize yourself with the dive site, and be aware of potential
hazards. Respect marine life and their habitats, and practice responsible diving and
photography techniques. Remember, capturing stunning images is important, but it
should never come at the expense of the environment or your own safety.

In conclusion, underwater photography is a thrilling and rewarding genre that opens up a
whole new world of visual exploration. By having the right equipment, understanding
lighting, mastering composition, practicing buoyancy control, and respecting safety
guidelines, you can capture awe-inspiring images that showcase the captivating beauty
of the underwater realm. So, gear up, dive in, and embark on an extraordinary
photographic adventure beneath the waves.

DPC starts Beginners Photography Workshop on weekdays . Batch starts 26th Dec

DPC announces Beginners Photography workshop which is also signature product of DPC on weekdays now.

Workshop alert-2

Course details: Beginners Photography Workshop

Workshop Highlight

Classes only on weekdays.
Know your camera and what it can do for you
Use different lighting situations to create drama in photos
Learn principles of composition and framing
Know why some pictures are more appealing than others
What and how do you click pictures to create the ‘WOW’ effect!

Functions covered–exposure (over & under), flash, white balance, depth of field, ISO

Workshop Benefits
Smaller batch size to ensure individual interaction and attention
Opportunity to interact with instructors/peers for as long as you want

You can also send your works for review and feedback even after the workshop is over

Certificate of participation
Your photos become eligible for showcasing in the club events

Profile of previous participants
Previous participants of these workshops have been college students, working professionals, home makers, and between 11 years to 45 years of age.

Requirements
Loads of enthusiasm and any digital camera 🙂

Workshop Fee : INR 6000


Art of Visual Story Telling

DPC Announces Brand new workshop on taking your photos to next level.

Art of Visual Story Telling 

Read the stats and know how you can help at www.reallygreatsite.com-2

Now that you’ve got a handle on your DSLR settings, it’s time to take your photography to the next level! Skilled photographer at Delhi Photography Club  will teach you pro tips of Photo Stories and photo essay .and lightroom  tricks. Dive into unique and more complex shooting techniques and methods to get the most out of your DSLR camera. You’ll learn about capturing more dynamic images, try out new concepts, and practice some post-production tricks to get the image you want. If you have a laptop with Photoshop installed, bring it along. If not, we’ll provide plenty of paper and pens for note taking!


Workshop Content and Highlights:

Understanding and creating the concepts .

How to Research

Photo stories

Photo Essays

Tricks and tips for light and speed trails ,Star trails

Editing tools more effectively and efficiently on Lightroom.


Workshop USP:

· Classes only on Weekdays 

· Indoor and Outdoor , hands on workshop

· Outdoor Practical session with instructor

· Assignment for practice at home

· Opportunity to interact with instructors/peers.

· Send your works for review and feedback

· Certificate of participation


Who can join this workshop?

Students

Amateurs & Beginners

Professionals

Aspiring artists

Home makers and Mothers

Keen on improving photos


Requirements:

Loads of enthusiasm and a DSLR camera or Digital Point n shoot and basics of Photography and know how of the camera


Workshop Fee: Rs 12000

Days : Wed , Thursday, Friday

Date : 09 Jan to 01 st Feb

Time : 2.30 pm to 5.00 pm

12 classes of 2.30 hours each.

Please note , in this class we will not be talking about basics of camera and exposure .