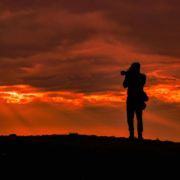
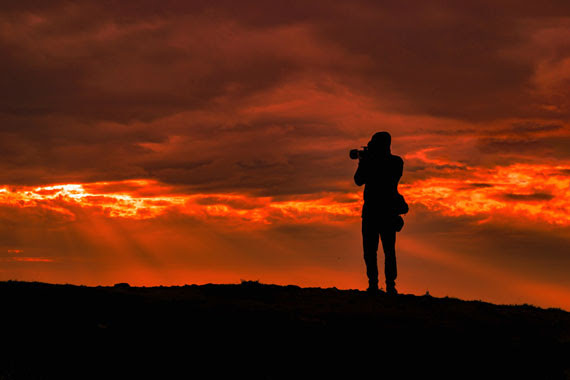
Photography is often celebrated for its ability to capture moments, tell stories, and create art. However, beneath the layers of technique and vision, there is an array of health benefits that many practitioners may not be fully aware of. Engaging in photography not only sharpens our visual acuity but also fosters well-being in various dimensions of our lives.
1. Mental Stimulation
Photography is a blend of creativity and technical skill. Every time you frame a shot, decide on settings, or edit a picture, you are making decisions that challenge and stimulate the brain. This mental exercise can help keep the mind sharp, potentially reducing the risk of cognitive decline as we age.
2. Mindfulness and Presence
The very act of looking through a viewfinder or display screen requires one to be in the moment. It encourages a mindfulness practice, as photographers must focus on the here and now. This state of presence can reduce stress and anxiety, offering a break from the fast-paced chaos of everyday life.
3. Physical Activity
While it might not be the first thing that comes to mind, photography often involves a significant amount of physical activity. Whether you’re walking through a city looking for the perfect shot, hiking up a mountain for a breathtaking landscape, or simply standing and crouching repeatedly to get the right angle, you’re getting your body moving.
4. Social Connection
Photography can be a bridge to meeting new people and forging connections. Whether it’s attending a workshop, joining a photography club, or interacting with subjects, the art creates numerous opportunities for social interaction, which is crucial for emotional health.
5. Boosted Self-Esteem
Mastering a new skill or getting recognition for a great photo can do wonders for one’s self-esteem. As photographers see their skills improve over time, or receive positive feedback, it instills a sense of accomplishment and boosts confidence.
6. Therapeutic Expression
Photography can serve as a therapeutic outlet for expressing and processing emotions. It allows individuals to convey feelings, thoughts, and narratives that might be challenging to articulate verbally. For many, it becomes a form of visual journaling, helping to process complex emotions and experiences.
7. Enhanced Observation Skills
Regularly practicing photography trains the eye to see details that might otherwise go unnoticed. This heightened sense of observation can translate into everyday life, making one more attuned to their surroundings and more appreciative of small wonders.
8. A Sense of Purpose
For some, photography offers a renewed sense of purpose, especially if they’re working on a project or aiming to convey a particular message. This motivation can provide direction and structure, often alleviating feelings of aimlessness or depression.
9. Connection with Nature
Many photographers are drawn to the great outdoors. Nature photography not only provides stunning subject matter but also exposes the photographer to fresh air, sunlight, and the therapeutic sounds of nature, all of which have proven health benefits.
Photography is more than just a hobby or profession—it’s a pathway to better health. As with any activity, the key is to enjoy the process, be patient with oneself, and stay curious. Whether you’re a seasoned professional or just starting, the act of capturing the world through a lens offers myriad benefits that enrich both the mind and body. So, pick up that camera, and let the journey to well-being begin!
http://www.delhiphotographyclub.com/wp-content/uploads/2023/10/unnamed-50.jpg380570#iamdpchttp://www.delhiphotographyclub.com/wp-content/uploads/2020/03/Copy-of-Celebrate-Freedom-3.png#iamdpc2023-10-14 08:40:042023-10-28 10:42:39Health Benefits of Practicing Photography and stay fit and alive.
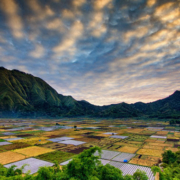
Clouds are nature’s masterpiece on the canvas of the sky. Their constantly evolving forms and ethereal presence create some of the most captivating images for photographers. Whether you’re a seasoned pro or a beginner, capturing clouds can elevate your photography game. Here’s a guide to the most interesting types of clouds to photograph and the best places to find them.
1. Cumulus Clouds:
Appearance: These are the classic, fluffy white clouds that often resemble cotton balls. They are relatively low in the sky and have well-defined edges.
Best for: Daytime landscapes, creating contrast against a deep blue sky.
Where to find them: Almost everywhere, especially in fair weather. Mid-day is often a good time.
Formation: Cumulus clouds form due to vertical convection currents caused by warming at the Earth’s surface. As warm air rises, it cools and condenses into these puffy clouds.
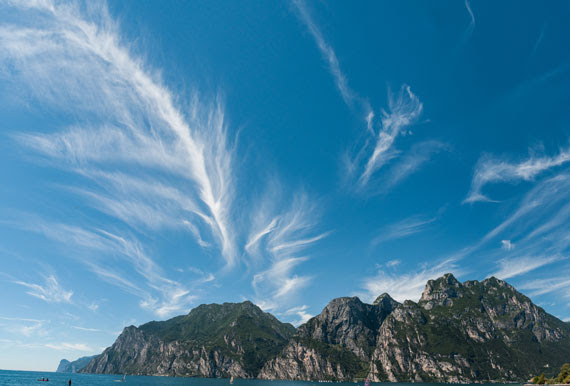
2. Cirrus Clouds:
Appearance: Wispy and thin, cirrus clouds often look like feathery strokes painted high in the sky.
Best for: Sunsets and sunrises, as their ice crystals can reflect vibrant colors.
Where to find them: They are high-altitude clouds, so they are pretty much everywhere. Look up on clear days.
Formation: Cirrus clouds form at high altitudes where the atmospheric pressure is low. Here, water vapor freezes into ice crystals. They are often formed from the outflow of other clouds or can be remnants of cumulonimbus clouds.
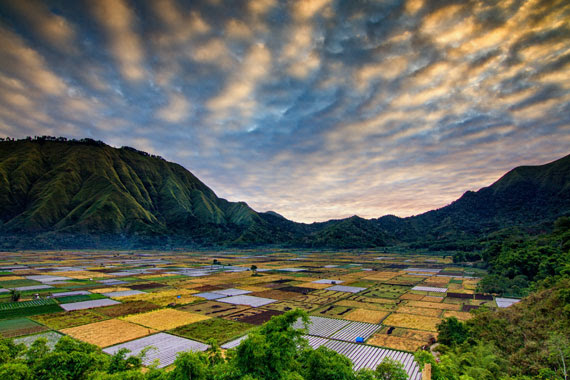
3. Stratus Clouds:
Appearance: These clouds form uniform layers, often covering the sky like a blanket, leading to overcast conditions.
Best for: Creating moody, atmospheric shots. Great for black and white photography.
Where to find them: Common in coastal areas or during foggy mornings inland.
Formation: Stratus clouds are typically formed through the gentle lifting of a large, relatively flat air mass. This lifting can be due to subtle features in the landscape or even an incoming weather front. They can also form from fog lifting off the ground.
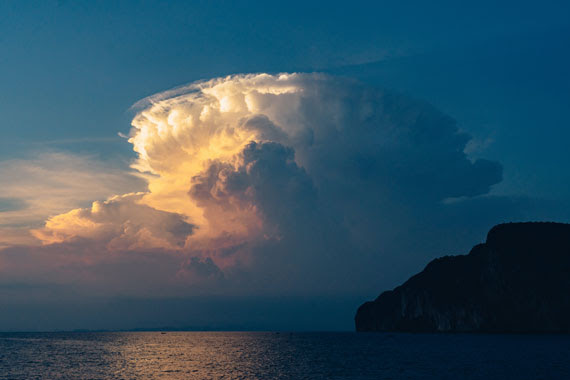
4. Cumulonimbus Clouds:
Appearance: Towering giants, they can develop anvil tops and can produce severe weather, including thunderstorms.
Best for: Capturing dramatic weather events like lightning or a storm’s approach.
Where to find them: Regions with frequent thunderstorms, like the American Midwest or tropical areas during the monsoon.
Formation: Cumulonimbus clouds are the result of vigorous convection currents. These are initiated by intense heating at the Earth’s surface. The warm air rises rapidly, and as it does, it cools and condenses. If the rising air is moist and unstable enough, it can lead to the formation of these towering storm clouds.
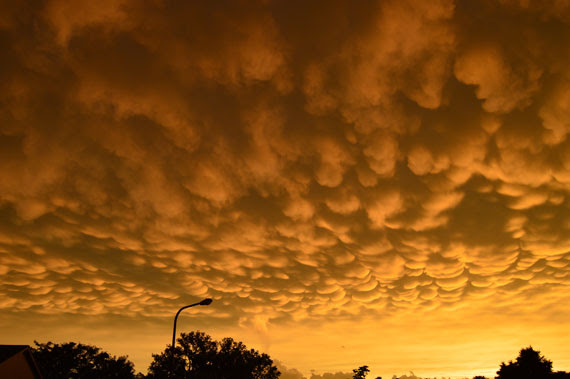
5. Mammatus Clouds:
Appearance: They are bubble-like pouches hanging underneath the base of a cloud, often associated with severe weather.
Best for: Adding drama and intrigue to your photos.
Where to find them: Often seen after severe thunderstorms have passed.
Formation: The exact cause is still debated, but one theory suggests that they form when cold air sinks down, creating pockets contrary to the usual puffy cloud formation. They’re often associated with severe weather and can appear after a storm.
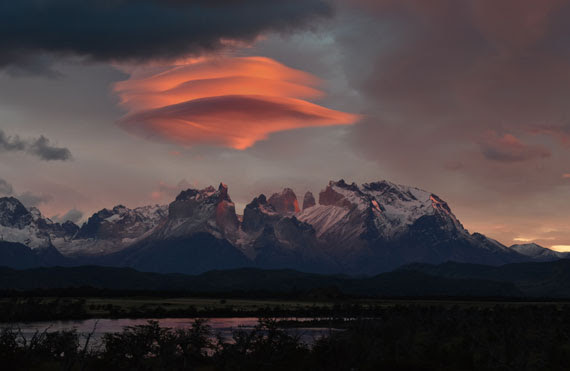
6. Lenticular Clouds:
Appearance: They resemble UFOs or lens shapes and form over mountains or other geographical features that disrupt the flow of the air.
Best for: Surreal landscapes, especially during sunset or sunrise when they can take on brilliant hues.
Where to find them: Mountainous regions like the Rockies or the Andes.
Formation: These form when moist air flows along the surface of the Earth and encounters obstructions like mountains or hills. These obstructions force the air to rise, and lenticular clouds form at the crest of the wave of rising air. Once the air passes over the obstruction and descends again, the cloud dissipates.
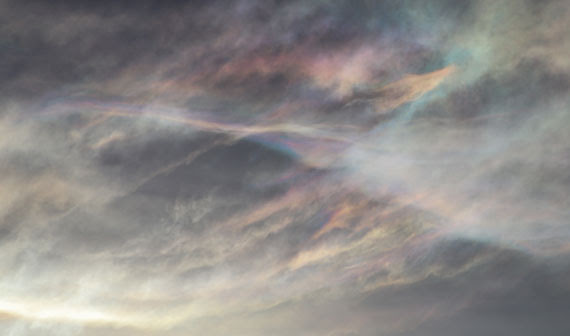
7. Nacreous (Mother of Pearl) Clouds:
Appearance: They shimmer with iridescent colors and form in the lower stratosphere over polar regions.
Best for: Ethereal, other-worldly shots.
Where to find them: Polar regions during winter, especially after sunset or before sunrise.
Formation: They form in the winter polar stratosphere at altitudes of 15,000–25,000 meters (49,000–82,000 ft). They’re made up mostly of ice crystals. The clouds’ iridescence is due to the diffraction of sunlight around the ice crystals.
Tips for Cloud Photography:
Golden Hour Glory: The time just after sunrise or before sunset provides a soft, golden light that can make clouds look especially breathtaking.
Use Filters: Polarizing filters can enhance the contrast between clouds and the sky.
Patience Pays: Cloud formations can change rapidly. Waiting can sometimes reward you with a magical shot.
General Principles of Cloud Formation:
The foundation of cloud formation is the Water Cycle. Here’s a brief overview:
Evaporation: Sun heats the Earth’s surface, causing water to evaporate from oceans, lakes, and rivers into the atmosphere.
Condensation: As the warm, moist air rises, it cools. When the air temperature drops to its dew point, the water vapor condenses into tiny droplets around particulates in the air, forming clouds.
Precipitation: When these water droplets combine and become heavy enough, they fall as precipitation.
In essence, clouds form when warm, moist air rises and cools, causing the water vapor in the air to condense around tiny particles, such as dust or smoke. Different atmospheric conditions, temperatures, altitudes, and more can result in the various cloud formations we see in the sky.
The world is full of breathtaking cloudscapes waiting to be captured. With patience, the right timing, and a bit of luck, photographers can capture the ethereal beauty of clouds in all their glory. So the next time you’re looking up, remember, the sky isn’t the limit—it’s the canvas!
http://www.delhiphotographyclub.com/wp-content/uploads/2023/10/unnamed-44.jpg380570#iamdpchttp://www.delhiphotographyclub.com/wp-content/uploads/2020/03/Copy-of-Celebrate-Freedom-3.png#iamdpc2023-10-12 07:50:312023-10-12 07:51:08The Most Photogenic Clouds and Where to Find Them
Delhi Photography Launches Delhi Academy of Visual Arts: A New Hub for Aspiring Photographers and Visual Artists
Delhi, India – Delhi Photography, a pioneer in the world of photography, is proud to announce the launch of its exciting new venture, the “Delhi Academy of Visual Arts.” This marks a significant step in empowering budding photographers and visual artists, offering them a platform to hone their creative skills and pursue their passion in the vibrant and dynamic world of visual arts.
With its rich history of promoting and nurturing creative talents, Delhi Photography has always been at the forefront of the photography industry. The launch of the Delhi Academy of Visual Arts is a natural progression, aimed at providing comprehensive training, resources, and a nurturing environment for individuals eager to explore and master the art of photography and other visual arts.
About Delhi Academy of Visual Arts:
The Delhi Academy of Visual Arts is not just an institution; it’s a haven for those who believe in the power of images and creativity. Offering a wide range of courses, this academy is designed to cater to the needs of individuals with varying levels of expertise – from absolute beginners to experienced photographers and visual artists looking to elevate their skills.
Key Features of Delhi Academy of Visual Arts:
Diverse Course Offerings: The academy offers a diverse range of courses, covering everything from art, photography, basics to advanced techniques, visual storytelling, digital post-processing, and much more. Whether you’re interested in portrait photography, landscape photography, or even experimental and fine art photography, there’s a course that’s tailored for you.
World-Class Instructors: At Delhi Academy of Visual Arts, you’ll be learning from the best in the industry. Our instructors are accomplished photographers and visual artists with years of experience and expertise, eager to share their knowledge and insights with students.
Practical Experience: We believe in learning by doing. The academy places a strong emphasis on hands-on experience, ensuring that you apply what you learn in the classroom to real-world projects and assignments.
Networking Opportunities: The academy provides an excellent platform for networking with fellow students, instructors, and professionals in the industry. You’ll have the chance to showcase your work, collaborate on projects, and build valuable connections.
Exhibition Opportunities: Delhi Academy of Visual Arts offers students the chance to exhibit their work, allowing them to gain exposure and recognition for their creative endeavors.
Why Choose Delhi Academy of Visual Arts:
Unmatched Expertise: Benefit from the experience and knowledge of accomplished photographers and visual artists.
Cutting-Edge Facilities: Access the latest photography and visual arts equipment and resources.
Career Opportunities: Gain the skills and knowledge needed to pursue a successful career in photography and the visual arts.
A Community of Creatives: Join a supportive community of like-minded individuals passionate about visual storytelling.
Delhi Academy of Visual Arts opens its doors to aspiring photographers and visual artists who want to take their creative journey to the next level. Whether you’re a novice or an experienced artist looking for fresh inspiration and learning opportunities, the academy is here to guide you.
The launch of Delhi Academy of Visual Arts is an exciting development for the art and photography community in Delhi and beyond. It represents a commitment to nurturing creativity and celebrating the power of visual storytelling.
Enrol now and be part of this incredible journey into the world of visual arts. For more information and to explore our course offerings, visit our website at [website link].
Delhi Academy of Visual Arts – Where Your Creative Vision Comes to Life!
http://www.delhiphotographyclub.com/wp-content/uploads/2023/10/Screenshot_2023-10-09_at_3.11.17_PM-removebg-preview.png494489#iamdpchttp://www.delhiphotographyclub.com/wp-content/uploads/2020/03/Copy-of-Celebrate-Freedom-3.png#iamdpc2023-10-11 09:29:482023-10-11 11:06:09Delhi Photography Launches Delhi Academy of Visual Arts
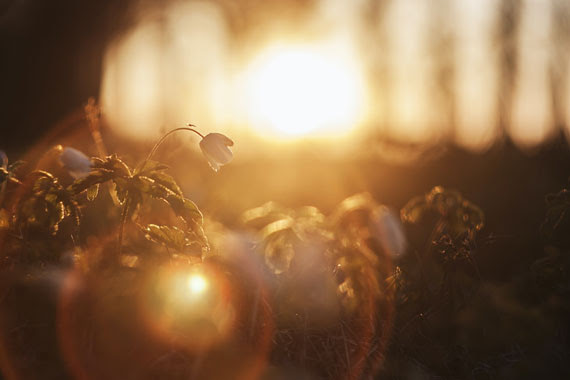
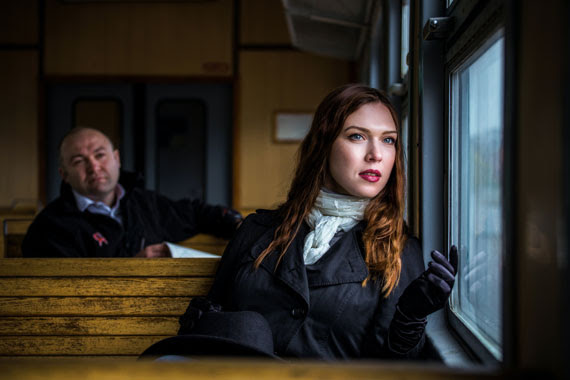
Soft lighting is a sought-after technique in the world of photography. It helps in reducing harsh shadows, creating a dreamy atmosphere, and bringing out the best features in a subject. Whether you’re an amateur photographer or a seasoned professional, understanding where to find soft lighting can elevate your photographs to new heights. Here’s a guide to the best places to find soft lighting:
Golden Hour Magic
The golden hour is the short window of time just after sunrise and just before sunset. The sun is low on the horizon, casting a warm and soft glow. The shadows are long and diffused, giving images a cinematic and dreamy look. This time is ideal for portraits, landscapes, and almost any genre of photography. The exact timing of the golden hour varies depending on your geographical location and the time of year, so using apps like “Golden Hour Calculator” can be a huge help.
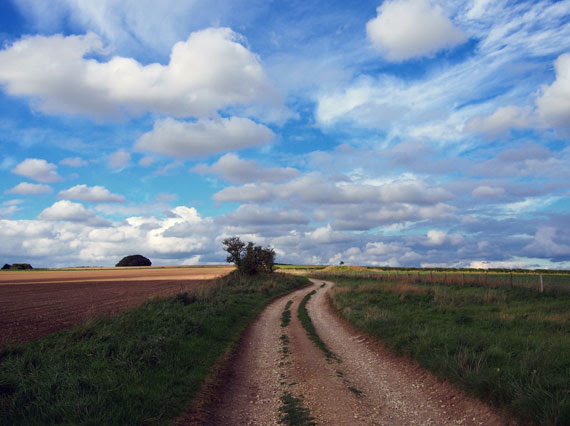
Overcast Days
Contrary to popular belief, a sunny day is not always a photographer’s best friend. Bright sunlight can lead to overexposed photos and harsh shadows. Overcast days, however, act as a natural diffuser, spreading the light evenly and reducing contrasts. It’s like having a massive softbox in the sky, perfect for outdoor shoots.
Shaded Areas
On a bright day, look for areas of shade, such as under a tree, an alleyway, or the shadow side of a building. These spots provide protection from the direct sun, allowing for soft lighting conditions. Remember to adjust your camera settings to account for the lower light levels.
Indoor Windows
Windows can act as natural softboxes. Position your subject near a window, but not directly facing it. The light streaming in is diffused by the glass and any curtains or blinds, creating a soft illumination. Morning is often the best time for window lighting, but it depends on the direction the window faces and any obstructions outside.
Reflectors and Diffusers
If you’re serious about achieving soft lighting, investing in reflectors and diffusers is a wise choice. Reflectors bounce light onto your subject, filling in shadows and creating an even tone. Diffusers, on the other hand, scatter light rays, turning harsh light into a gentle glow. They can be particularly helpful when shooting in midday sun.
Artificial Lighting
Sometimes, nature won’t cooperate, and you’ll need to create your own soft lighting. Softboxes, umbrellas, and LED panels are all tools that photographers use to mimic the soft, diffused light found in nature. When using artificial lighting, it’s crucial to understand the direction and intensity of the light to achieve the desired effect.
In conclusion, soft lighting is a vital tool for photographers aiming to produce ethereal, flattering, and professional images. Whether harnessing the natural glow of the golden hour, utilizing the even illumination of overcast skies, or employing tools like reflectors and softboxes, understanding and mastering soft lighting techniques can truly transform one’s photographic output. Both natural and artificial sources offer opportunities to achieve this effect, making it accessible to photographers of all levels. By being observant, adaptive, and knowledgeable about these techniques, one can elevate their photography, capturing moments in their most beautiful light.
http://www.delhiphotographyclub.com/wp-content/uploads/2023/10/unnamed-41.jpg380570#iamdpchttp://www.delhiphotographyclub.com/wp-content/uploads/2020/03/Copy-of-Celebrate-Freedom-3.png#iamdpc2023-10-09 07:59:052023-10-27 11:37:22Finding Soft Light for Photography
Whenever I photograph at a popular landscape photography location, I usually see a mass exodus of photographers as soon as the sun goes down. For many years, I was part of this exodus, as I believed the best light was gone as soon as the sun set. This was before I discovered the magic of twilight. Now, I see the sunset not as the end of my photo shoot, but as the beginning.
There are three stages of twilight – civil twilight, nautical twilight, and astronomical twilight. Each of these stages lasts about 30 minutes, though it can be longer or shorter depending on where you are on the planet and what time of year it is. You can determine the exact times each of these twilight stages occurs on many websites, including the astronomy section of WeatherUnderground. You can also find this information on apps like PhotoPills or The Photographer’s Ephemeris.
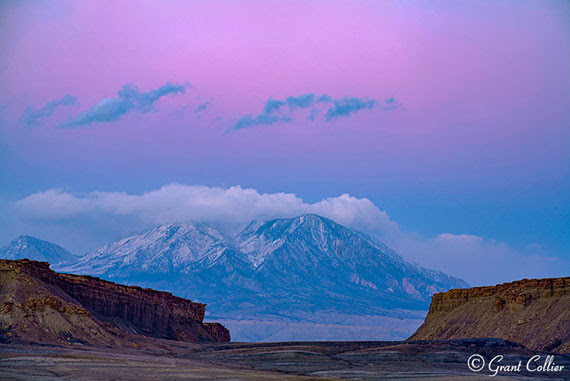
The Belt of Venus shines above Utah’s Henry Mountains. f7.1, 0.3 seconds, ISO 100
The first stage of twilight after sunset and the last stage before sunrise is known as civil twilight. It occurs during the time the sun is between 0 to 6 degrees below the horizon. During this time, you can often get vibrant colors in the sky, since a lot of light from the sun is scattered and refracted by the atmosphere. The clouds may have some of the bright orange or pink glow that you would see at sunrise or sunset. You can also capture images of Earth’s shadow, which is the shadow that Earth casts on its atmosphere. This shadow will usually appear with a bright pink band of sky above it, known as the Belt of Venus or the anti-twilight arch.
If you’re lucky, you may also see anticrepuscular rays rising towards the heavens shortly after sunset. These can appear at the spot where the sun set or directly opposite the spot the sun set.
Civil twilight is an excellent time to capture images of the moon and some of the brightest stars and planets. The moon will be visible throughout this time, while some stars and planets will be visible towards the end of civil twilight in the evening (or the beginning of it in the morning).
The period when the stars and planets are just visible is often referred to as the blue hour (even though it only lasts about 20 minutes in most locations). During this time, blue wavelengths of light from the sun are more easily refracted by the atmosphere back onto the land, making the scene appear bluer than usual. This effect is most pronounced near the end of civil twilight in the evening (or the beginning of civil twilight in the morning), though it is noticeable before and after this time.
You can capture some intriguing images during the blue hour. If you are photographing something that is already blue, like the ocean, it can further deepen the blues, giving a somewhat surreal effect to the photo. This may not be as desirable if you are photographing objects that aren’t blue, as it can give the appearance of a color cast across the image. In this scenario, you can increase the white balance temperature until the colors look better.
A partially-eclipsed moon rises above Balanced Rock in Utah. f5.6, 1/10 seconds, ISO 100
During civil twilight, it will usually be light enough to get good exposures using your camera’s exposure meter. However, you should check the histogram after you take your photos. Make sure the data extends to the right side of the histogram, without blowing out any highlights.
After civil twilight in the evening comes nautical twilight.
Part II – Nautical Twilight
Although civil twilight is a great time to capture landscape photos, the magic of twilight does not end there. After civil twilight in the evening (and before it in the morning) is a period known as nautical twilight.
This stage occurs from the time the sun is 6 to 12 degrees below the horizon. During this time, you can get unique images that convey the brief moment in time between the dark of night and the light of day.
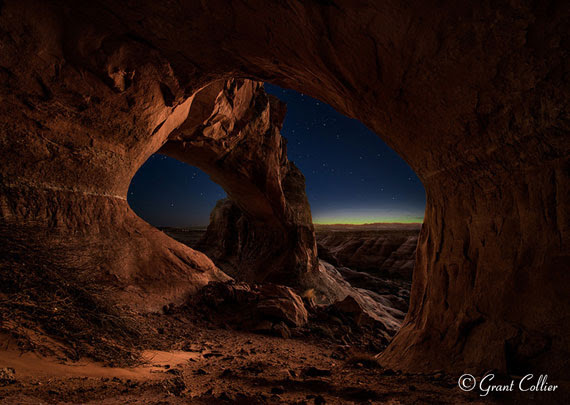
A remote natural arch is seen from a small cave in Utah. f2.8, 15 seconds, ISO 1000.
During nautical twilight, it will start to become too dark to use your camera’s exposure meter. You’ll need to switch to manual exposure on your camera. You should use the widest aperture you can, while still getting everything in focus. You’ll need to use longer and longer exposures (up to about 20 seconds) and start raising the ISO to properly expose your image and get data extending to the right side of your histogram.
It will start to look quite dark to the naked eye during nautical twilight. However, your camera can still capture light from the sun that is refracted by the atmosphere. You’ll usually get the best light on the land when facing away from the spot the sun set (or is about to rise). If, on the other hand, you face towards the direction of the sun, you can often get vivid colors in the sky above the horizon. If there was a vibrant sunset, some of the colors on the clouds might last until nautical twilight.
During the beginning of nautical twilight in the evening (or the end of it in the morning), it will often be light enough to get a good exposure of both the land and the sky with a single shot. As the light fades, you’ll likely need to combine two exposures if you want to get good detail in the land. You can take a longer exposure for the land and a shorter exposure for the sky and blend them in post-processing. I go into this in more detail in Collier’s Guide to Night Photography.
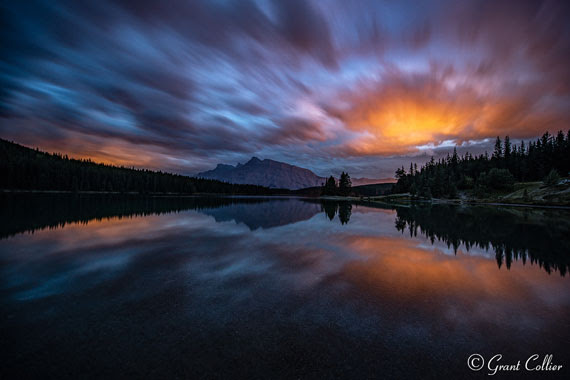
Light from a distant town bonces of clouds above Two Jack Lake in Canada. f2.8, 30 seconds, ISO 400.
The sky will appear blue throughout nautical twilight, and your camera will be able to capture quite a few stars in the sky. However, it won’t be dark enough to produce dramatic images of the Milky Way. To do this, you’ll need to wait until the next stage of twilight, called astronomic twilight.
Part III – Astronomical Twilight
After nautical twilight in the evening (and before it in the morning) is a period known as astronomical twilight. This stage of twilight occurs when the sun is 12-18 degrees below the horizon. The sky will appear almost completely dark to the naked eye, but there will still be some light from the sun refracted through the atmosphere that can be picked up by a camera.
At the beginning of astronomical twilight in the evening, the sky will still have a bluish color to it. If there is no moon out, the sky will fade to purple and then to black at the end of twilight. There may also be some reds or yellows in the direction the sun set (or is about to rise).
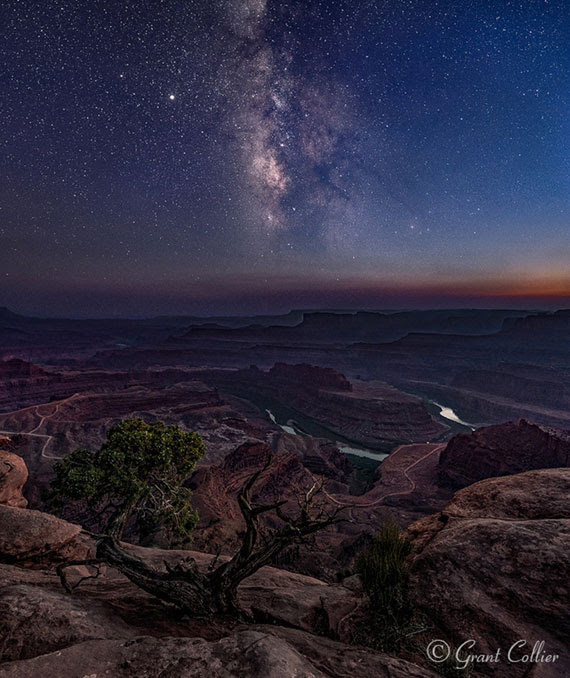
If there is no moon or a thin crescent moon, the skies will become sufficiently dark that you will be able to capture many stars and the Milky Way in your images. If there is a brighter moon out, the light from it will likely overpower any light refracted through the atmosphere from the sun. Your images will look about the same as photos taken under a moon in the dark of night – the sky will appear blue, the foreground will be lit up, and some stars will be obscured.
The Milky Way rises above Dead Horse Point in Utah. Stacked images, f1.8, 13 seconds, ISO 1600.
Even if there is no moon out, you can still get a little light on the foreground if you are facing away from the spot the sun set (or is about to rise). However, unless you are photographing something with a very bright, reflective surface, you’ll probably need to illuminate the foreground with a flashlight or stack multiple exposures, as described in my book Collier’s Guide to Night Photography, to get good detail throughout the image.
You will need to use a manual exposure setting to capture photos during astronomical twilight. You should generally use the widest aperture on your lens and a higher ISO setting of around 1600 to get good exposures. Your shutter speed can be set using the rule of 500 to keep the star trails to a minimum. Just take 500 divided by the focal length of your lens to get the exposure time in seconds (for cropped sensors, you’ll need to multiply by the crop factor of your lens to get the effective focal length). For example, if you use a 24mm lens, you would take 500 / 24 = 20.8. So 20 seconds would be your exposure time.
Fortunately, you won’t have to stop shooting after the end of astronomical twilight in the evening. There will no longer be light refracted through the atmosphere, but you can often get some green and red color in the sky from airglow. The skies will also be at their darkest, making it a great time to shoot the Milky Way. There really is no bad time to shoot at night. You can take images as soon as the sun sets and keep shooting as long as you want, while the light of day fades into the blackness of night.
http://www.delhiphotographyclub.com/wp-content/uploads/2020/03/Copy-of-Celebrate-Freedom-3.png00#iamdpchttp://www.delhiphotographyclub.com/wp-content/uploads/2020/03/Copy-of-Celebrate-Freedom-3.png#iamdpc2023-10-06 07:12:382023-10-06 07:12:40The Magic of Twilight