Posts

The Most Popular Focal Length for Landscape Photography

When it comes to landscape photography, choosing the right focal length is crucial for capturing breathtaking and expansive scenes. The most popular focal lengths for landscape photography typically fall within the wide-angle range, as they allow photographers to include as much of the scene as possible within the frame. Here’s a look at why certain focal lengths are favored and how they impact landscape photography.

The 24mm focal length has become the gold standard in landscape photography for several reasons, contributing to its popularity among enthusiasts and professionals alike. This preference stems from its ability to provide a wide field of view, capturing vast landscapes in a single frame without the extreme distortion often found with wider lenses. It offers a natural perspective that closely mirrors the human eye, making scenes appear expansive yet true to life.
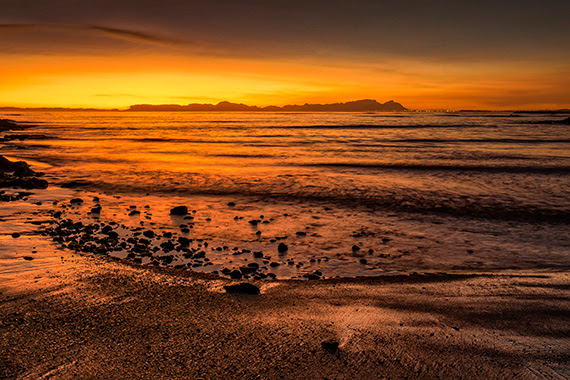
Photographers favor 24mm because it excellently balances foreground interest with the depth of the background, creating dynamic and engaging compositions. Its versatility in various settings, from mountain ranges to urban landscapes, further cements its status as a preferred choice. The 24mm lens, by offering this unique blend of wide-angle perspective and minimal distortion, has become an indispensable tool for capturing the beauty and grandeur of the natural world, making it a clear favorite in the landscape photography community.

Wide-Angle Lenses (24mm to 35mm)

Within the wide-angle category, lenses ranging from 24mm to 35mm are particularly beloved for their versatility. These focal lengths capture a broad field of view, making them ideal for including sweeping vistas and dramatic skies in the composition. A 24mm lens is especially favored for its balance, as highlighted above, but even moving towards 35mm can offer a slightly tighter composition while still retaining a wide perspective.

Ultra-Wide Lenses (14mm to 24mm)

For photographers aiming to capture an even wider perspective, ultra-wide lenses ranging from 14mm to 24mm are the go-to choice. These lenses excel at emphasizing foreground elements and creating a profound sense of depth and scale. However, they may introduce noticeable distortion, which can either be used creatively or need to be corrected in post-processing.

Standard to Short Telephoto Lenses (50mm to 100mm)

Beyond the realm of wide and ultra-wide lenses, standard to short telephoto lenses (50mm to 100mm) offer a unique perspective in landscape photography. A 50mm lens provides a view close to that of the human eye, offering compositions with minimal distortion and a natural feel. Lenses in the 70mm to 100mm range are excellent for isolating subjects, compressing scenes, and highlighting specific features of the landscape, offering a different approach to capturing nature’s beauty.

Summary:

The choice of focal length for landscape photography depends greatly on the photographer’s vision, the landscape being captured, and the desired outcome. While wide and ultra-wide lenses are popular for their capacity to envelop expansive scenes, longer focal lengths provide unique perspectives and compositional opportunities. The 24mm lens, in particular, stands out for its unparalleled ability to balance the vastness of landscapes with realistic perspectives, making it a favorite among landscape photographers. Experimentation with different focal lengths can unlock new and exciting ways to depict the natural world, continually enriching the art form of landscape photography.

Mastering the Art of Scale in Landscape Photography

One of the primary challenges in landscape photography is capturing the vastness and grandeur of a scene in a way that translates well to a two-dimensional image. This is where the concept of ‘scale’ comes into play. Including an element of scale can provide context and a sense of proportion, making your landscapes more compelling and relatable. Here are some techniques to effectively show scale in your landscape photographs:

1. Introduce a Human Element

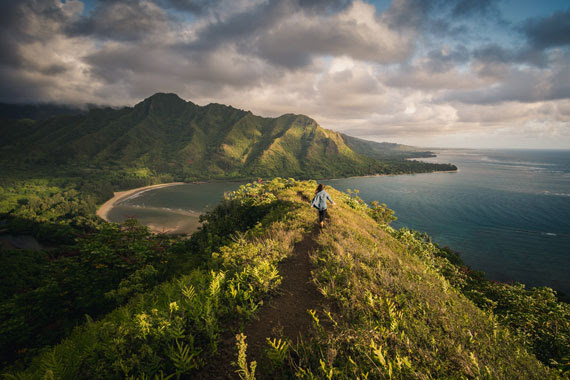
Including a person in your landscape shot is one of the easiest ways to convey scale. The viewer instinctively knows the approximate size of a human, which provides an instant reference. This technique works especially well with grand landscapes such as mountains, canyons, or vast fields.

2. Use Familiar Objects

If a human figure isn’t available or doesn’t fit the context, other familiar objects can serve as a reference. This can include things like vehicles, animals, or even buildings. For example, a lone car on a winding road amidst massive mountains can effectively show the enormity of the scene.

3. Layering and Foreground Elements

Introducing layers in your image, especially with a strong foreground element, can provide depth and a sense of scale. A prominent rock, tree, or other subject in the foreground, juxtaposed with the middle and background layers, helps the viewer gauge distances and sizes in the scene.

4. Use Wide Lenses

Wide-angle lenses inherently capture more of a scene, making vast landscapes look even vaster. When you pair a wide lens with a strong foreground element, the exaggeration of perspective further amplifies the sense of scale.

5. Capture Atmospheric Perspective

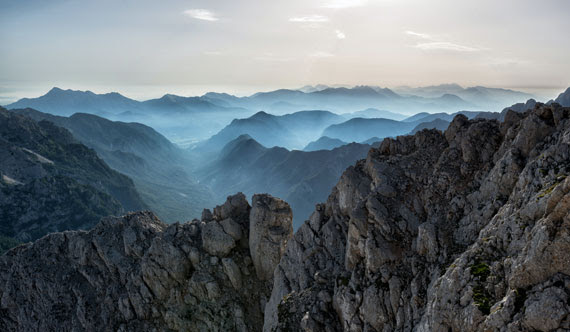
Atmospheric perspective is the phenomenon where distant objects appear lighter and less saturated due to atmospheric haze. Capturing scenes with evident atmospheric perspective (like layers of mountains fading into the distance) can give a sense of vastness and depth, thus emphasizing scale.

6. Play with Shadows and Light

The play of light and shadow, especially during the golden hours of sunrise and sunset, can add depth and dimension to a scene. Long shadows cast by trees, rocks, or mountains can show the viewer how grand or tall these elements are.

7. Use Leading Lines

Leading lines can guide a viewer’s eye through an image and provide a visual journey that showcases the scale. Rivers, roads, or even patterns in sand dunes can serve as leading lines, drawing the viewer from the foreground to the distant horizon.

8. Drones and Aerial Photography

With the rise of drone photography, there’s a unique opportunity to capture landscapes from a bird’s-eye view. This perspective can reveal patterns and proportions that are hard to grasp from the ground, offering a fresh way to showcase scale.

Conveying scale in landscape photography is all about providing context. By giving the viewer a reference point, be it a person, object, or the play of light and shadow, you can transform a flat image into a story of vastness and grandeur. Next time you’re out with your camera, consider these techniques to infuse a sense of scale into your landscapes, making them more immersive and captivating.

Balance and Visual Weight in Landscape Photography

Landscape photography is all about capturing the essence of a place and evoking emotion in the viewer. One of the most effective ways to achieve this is by understanding and using the principles of balance and visual weight. These concepts help the photographer create harmonious compositions that captivate the viewer’s attention.

1. Understanding Balance

Balance in a photograph refers to the distribution of visual elements, ensuring that no one part of the image overwhelms another. This creates a sense of equilibrium, where the viewer feels at ease when looking at the photograph.

There are two main types of balance:

  • Symmetrical Balance: This occurs when both halves of an image mirror each other. Think of reflection shots, where a mountain is reflected perfectly in a still lake.
  • Asymmetrical Balance: This is achieved when different elements on either side of an image have equal visual weight but are not identical. For instance, a large tree on one side might be balanced by a cluster of smaller trees on the other.

2. Grasping the Concept of Visual Weight

Visual weight refers to the ability of an element within an image to draw the viewer’s attention. Factors that contribute to an element’s visual weight include:

  • Size: Larger objects typically have more visual weight than smaller ones.
  • Contrast: An element that contrasts with its surroundings, either in color, tone, or texture, will stand out.
  • Placement: Elements placed towards the center tend to feel heavier than those at the edges.
  • Complexity: Detailed or complex subjects can draw more attention than simpler ones.

3. Tips for Achieving Balance with Visual Weight

  • Rule of Thirds: Place main subjects on the intersections of the dividing lines. This naturally achieves balance in many scenes.
  • Use Leading Lines: Paths, rivers, or shadows can guide the viewer’s eyes through the frame, balancing out elements of visual weight.
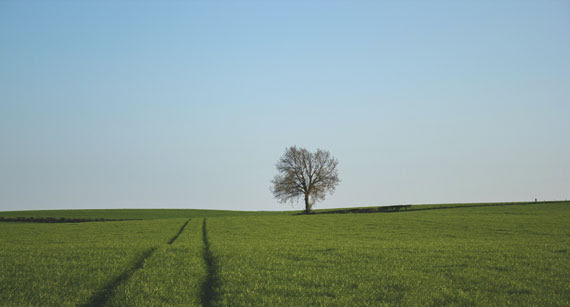
  • Incorporate Negative Space: The empty space can balance a prominent subject, preventing it from overwhelming the image.
  • Pay Attention to Natural Symmetry: Reflections, shadows, and formations can provide natural ways to balance a photo.

4. The Intentional Imbalance

There are moments when an intentional imbalance can be powerful. By making one element overwhelmingly dominant, photographers can evoke feelings of loneliness, awe, or vulnerability. However, it’s essential to use this technique judiciously to avoid confusing the viewer.

Conclusion

Understanding balance and visual weight is crucial for creating compelling landscape photographs. By mastering these concepts, you’ll be better equipped to guide your viewer’s eye through your image, telling a more engaging story about the scene you’ve captured. Like all rules in art, once you understand them thoroughly, don’t be afraid to break them creatively to achieve the mood or message you’re aiming for in your work.

Focus Stacking