Posts

Street Photography Tips at Night- upgrade your photos.

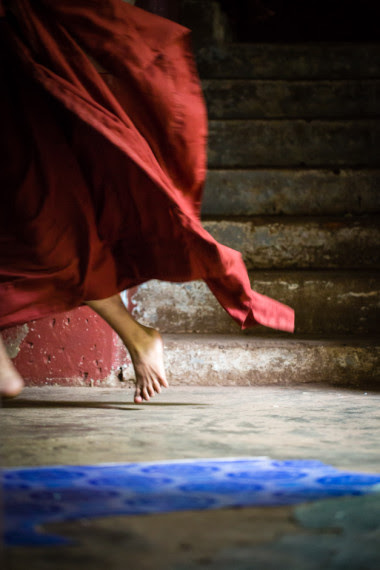
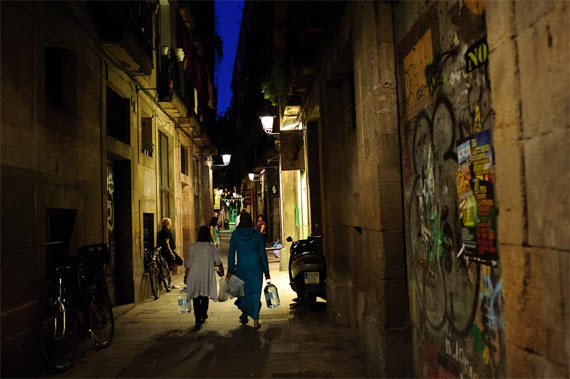
Taking pictures at night gives an image a completely different feel because it captures different stories of daily life—sometimes more dramatic than the ones captured during the day. There is also a whole new cast of characters at night that make taking pictures on the streets after dark an even more adventurous experience in street photography.

Just by decreasing the available light, we increase the element of mystery in the image. Don’t get me wrong, it could still be an average image. Just because it was taken at night the picture won’t magically become a great photograph, but it might become a little bit more interesting. It may make the viewer ask just a few more questions. And depending on where you are, it may even add an element of danger.

“You don’t have to go looking for pictures. The material is generous. You go out and the pictures are staring at you.” –Lee Friedlander

Here are a few tips for taking street photos at night:

1. Don’t use flash

I think this is key for several reasons. First, the ugly artificial light that results from the flash is just too harsh and unnatural. It also calls way too much attention to the photographer, and the idea in street photography is to blend in, not stand out like a lighthouse. Also, people expect the flash to go off after you take a picture at night; when they don’t see the bright light coming from the camera that was pointed at them, they think that you didn’t take a photo and they probably won’t question you. I never use flash when I shoot at night (or day or ever, for that matter). It might take some practice but in a short time you won’t miss it.

2. Increase the ISO

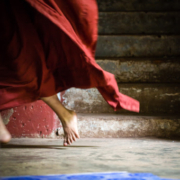
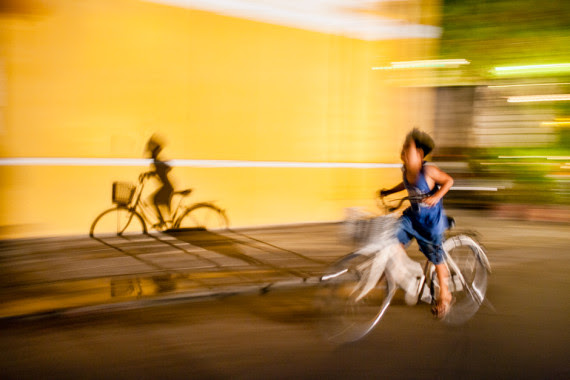
More than a suggestion, this is a necessity. Unless you increase the ISO, the shutter speed might become too slow and the whole picture will be way too blurry to even see what’s going on. As I wrote before, a little bit of motion blur is fantastic and makes for great street photography shots. But if the photo’s too blurry it loses the effect and is just confusing.

High ISO will also give the image some “noise” and it will look grainy, which is a great look for street photography. Make grain and blur your friends, not your enemies.

“New images surround us everywhere. They are invisible only because of sterile routine convention and fear.” –Lisette Model

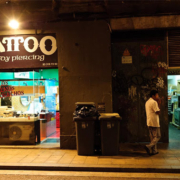
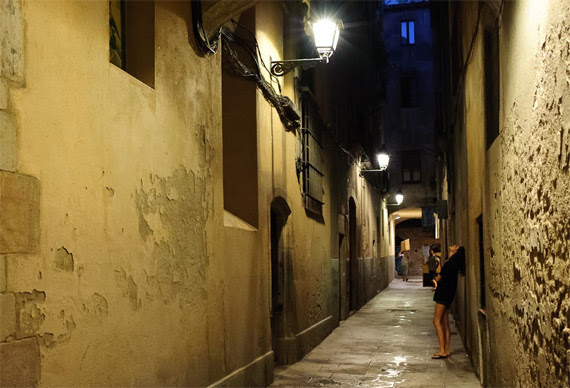
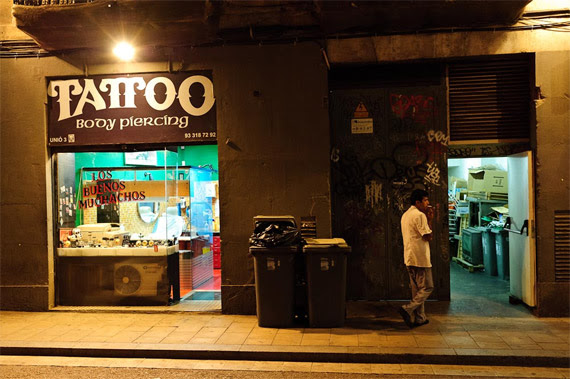
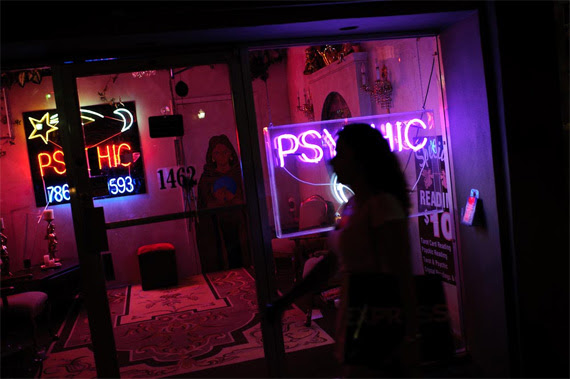
3. Use available light to your advantage

Find a bright corner or a storefront window and position yourself in a way that it will light your subject’s face. Or maybe you want the light to their backs to make them silhouettes. Either way is fine, the choice is yours. It’s all a matter of moving around the light. Find what works and wait for an interesting subject to walk by. Try pointing the camera into the inside of storefronts or brightly lit buses; the light may be just enough to capture great scenes of people unaware that you are capturing the scene.

4. Use fast lenses

Fast lenses, with maximum apertures such as f/2.8 or f/1.4 are great for low light situations. The same thing applies to full frame cameras. Any lens or camera is fine but full frame cameras or fast lenses make things easier because they have a better sensitivity to light. Use what you have and practice and look at the results before you invest your paycheck in a more expensive camera or lens.

“Anything that excites me for any reason, I will photograph; not searching for unusual subject matter, but making the commonplace unusual” –Edward Weston

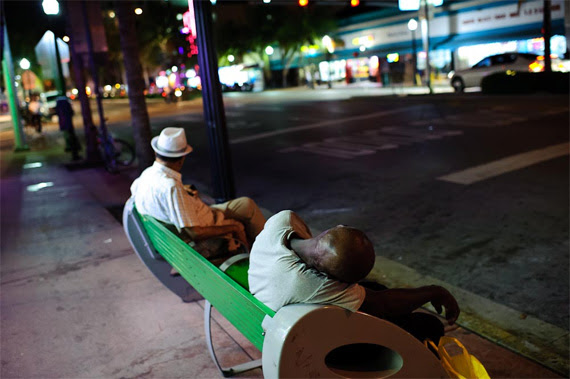
5. Avoid isolated areas

It’s not necessary to go to a dangerous area to get interesting pictures. Any crowded area will do, especially if you are just starting.

Taking pictures on the streets at night is not the usual thing to do, but if you want to give your street photography a little extra excitement consider going out for a walk after the sunlight has been replaced by street lamps.

Do you follow the Process of Taking a Photo?

We divide the process into 4 steps: Camera Settings, Observation, Anticipation, and Experience.

Camera Settings

One of the best ways to be efficient in travel and street photography is to be fast; especially in Southeast Asia, where things are so busy. Mastering camera settings is the first step to becoming fast. This is the reason I advise my students to use aperture priority mode when shooting (at least during the day) and to always adjust their settings when entering a new light situation (a brighter or darker area).

Once this is done, it becomes something less to worry about when a photo opportunity presents itself. The photographer’s reaction will also be faster if they can find all buttons and functions instinctively, as the camera becomes an extension of the body. Knowing what aperture to use depending on the depth of field desired and the distance of the subject, finding the ISO button while looking through the viewfinder, etc. All these little things will help the photographer win seconds, which are vital and will make light work of a spontaneous shot.

The need to be very fast and know camera settings was essential to capture this ephemeral moment. (Photo by Etienne Bossot)

Observation

Every good travel or street photographer (not to mention photojournalist) is a great observer.

Being aware of their surroundings, the photographer will use a shorter time to make important decisions, such as how to use the natural light, or which foreground and background to use. This is necessary, mostly when composing an image involves the subject itself at the very end.

Observing and seeing this girl running down allowed me to pick up the proper background. (Photo by Etienne Bossot)

Anticipation

Once you’ve got camera settings and observation skills primed, anticipation is the next skill to master. Moving ahead in preparation of the photo concept, anticipating where a potential subject is going to be and where the light is going to move is key to shooting a great photo. This requires being physically fit enough to be able to move quickly, sometimes over holes, puddles, trees, walls, rivers, highways, magma, etc.

Being comfortable with camera settings will help win seconds, which are vital for the photographer. I often find that my students are missing great photo opportunities because they feel rushed. Mostly when traveling to exotic locations where everything is new, beautiful, and photogenic, they are often overwhelmed by all the great potential photos to be shot and rush to shoot as many things as possible. What happens then? The brain stops working. The result is a lack of discipline in creating composition, and as is very often the case, the use of the wrong camera settings (leading to a slow shutter speed and blurry photos).

Once the camera settings are prepared, the environment understood, and the photograph concept set up in the mind, it frees you up to think of the details and techniques that will make a great composition.

Man in a field that has just been plowed. When seeing that man from far away, I ran in order to have him right in front of the lush green background. (Photo by Etienne Bossot)

Experience

We tend to compose images using a few of the photography techniques we have learned, but mostly it’s an unconscious act of applying what we know that makes a good photo. For this we are using, as Michael Freeman mentions in his book, a “repertoire” of photos we have previously seen or taken and that we know work for us.

Using lines as diagonals, applying the rule of thirds, having our subject framed a certain way, etc. This is very important in order to be fast and make decisions; it also increases the risk of taking the same photo “template” over and over again.

Thus the need of extra time, gained by preparation, observation, anticipation and applying our experience, to adjust the composition and create something new, special, different, and reach another level of creativity.

Everything was ready and patiently prepared. Then the subject arrived… Click.