Posts

Do you follow the Process of Taking a Photo?

We divide the process into 4 steps: Camera Settings, Observation, Anticipation, and Experience.

Camera Settings

One of the best ways to be efficient in travel and street photography is to be fast; especially in Southeast Asia, where things are so busy. Mastering camera settings is the first step to becoming fast. This is the reason I advise my students to use aperture priority mode when shooting (at least during the day) and to always adjust their settings when entering a new light situation (a brighter or darker area).

Once this is done, it becomes something less to worry about when a photo opportunity presents itself. The photographer’s reaction will also be faster if they can find all buttons and functions instinctively, as the camera becomes an extension of the body. Knowing what aperture to use depending on the depth of field desired and the distance of the subject, finding the ISO button while looking through the viewfinder, etc. All these little things will help the photographer win seconds, which are vital and will make light work of a spontaneous shot.

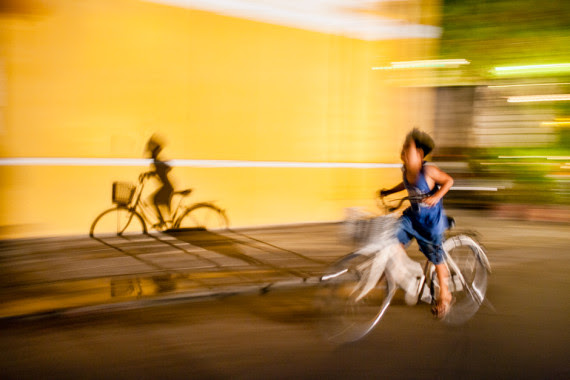
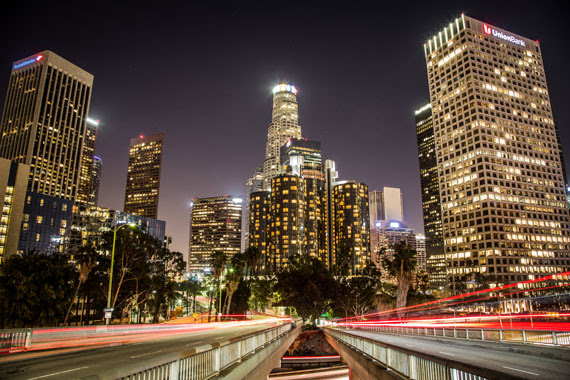
The need to be very fast and know camera settings was essential to capture this ephemeral moment. (Photo by Etienne Bossot)

Observation

Every good travel or street photographer (not to mention photojournalist) is a great observer.

Being aware of their surroundings, the photographer will use a shorter time to make important decisions, such as how to use the natural light, or which foreground and background to use. This is necessary, mostly when composing an image involves the subject itself at the very end.

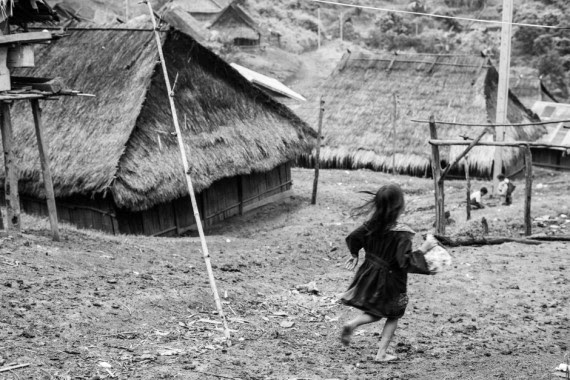
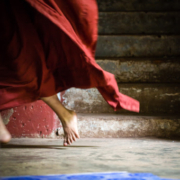
Observing and seeing this girl running down allowed me to pick up the proper background. (Photo by Etienne Bossot)

Anticipation

Once you’ve got camera settings and observation skills primed, anticipation is the next skill to master. Moving ahead in preparation of the photo concept, anticipating where a potential subject is going to be and where the light is going to move is key to shooting a great photo. This requires being physically fit enough to be able to move quickly, sometimes over holes, puddles, trees, walls, rivers, highways, magma, etc.

Being comfortable with camera settings will help win seconds, which are vital for the photographer. I often find that my students are missing great photo opportunities because they feel rushed. Mostly when traveling to exotic locations where everything is new, beautiful, and photogenic, they are often overwhelmed by all the great potential photos to be shot and rush to shoot as many things as possible. What happens then? The brain stops working. The result is a lack of discipline in creating composition, and as is very often the case, the use of the wrong camera settings (leading to a slow shutter speed and blurry photos).

Once the camera settings are prepared, the environment understood, and the photograph concept set up in the mind, it frees you up to think of the details and techniques that will make a great composition.

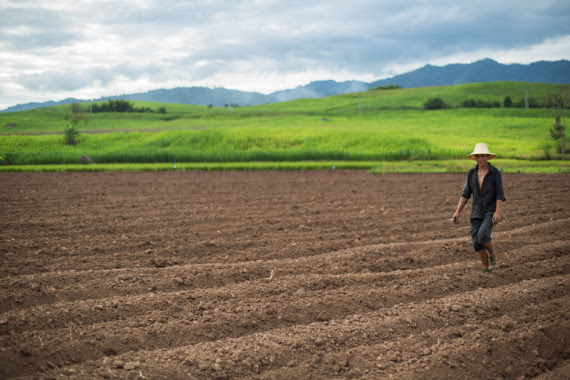
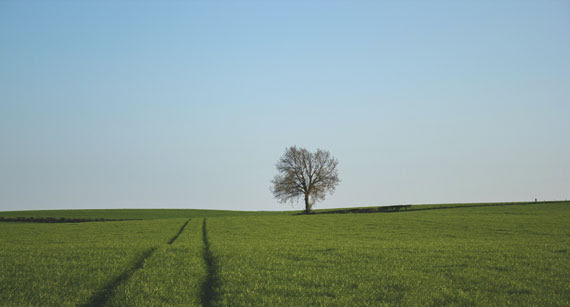
Man in a field that has just been plowed. When seeing that man from far away, I ran in order to have him right in front of the lush green background. (Photo by Etienne Bossot)

Experience

We tend to compose images using a few of the photography techniques we have learned, but mostly it’s an unconscious act of applying what we know that makes a good photo. For this we are using, as Michael Freeman mentions in his book, a “repertoire” of photos we have previously seen or taken and that we know work for us.

Using lines as diagonals, applying the rule of thirds, having our subject framed a certain way, etc. This is very important in order to be fast and make decisions; it also increases the risk of taking the same photo “template” over and over again.

Thus the need of extra time, gained by preparation, observation, anticipation and applying our experience, to adjust the composition and create something new, special, different, and reach another level of creativity.

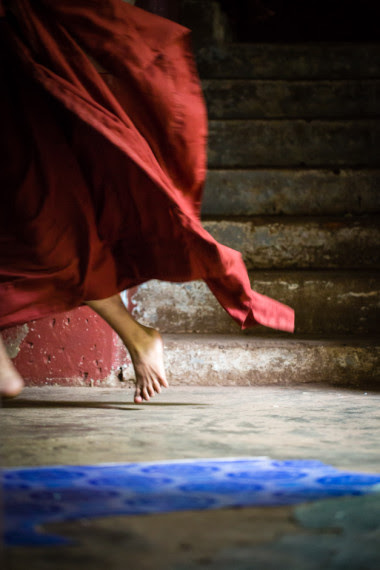
Everything was ready and patiently prepared. Then the subject arrived… Click.

Cityscape Photography Tips

Cityscape photography, often viewed as the urban cousin of landscape photography, captures the man-made wonder of our urban environments. Whether you’re aiming to capture the grandeur of towering skyscrapers, the dance of city lights, or the daily buzz of urban life, the right techniques and tools can make a world of difference.

Understanding Cityscape Photography

At its core, cityscape photography encapsulates the beauty, architecture, and vibrancy of urban landscapes. From the neoclassical edifices of Europe to the cutting-edge skyscrapers of Asia, cityscapes tell stories of progress, history, and human ambition.

Essential Equipment for Cityscape Photography

Lenses:

  • Wide-angle lens (10-24mm): Ideal for capturing sweeping vistas of urban jungles.
  • Telephoto lens (70-200mm): Perfect for zooming in on intricate architectural details or isolating subjects against a vast city backdrop.

Tripod: A sturdy tripod is invaluable. For shots with long exposures, like capturing the streaks of cars or the gentle flow of water, a tripod ensures your camera stays still and your images are crisp.

Helpful Filters:

  • Polarizer: Helps to reduce reflections, particularly useful for buildings with glass facades.
  • Neutral Density (ND) filter: Essential for achieving long exposure effects during bright daylight.

Optimal Camera Settings for Cityscapes

  • Mode: Opt for Manual (M) if you’re familiar with settings or Aperture Priority (Av/A) if you’d like the camera to determine the shutter speed.
  • Aperture: A range of f/8 to f/16 offers a good depth of field, ensuring both foreground and background elements are in focus.
  • Shutter Speed: This will vary based on your desired effect. For capturing light trails, you’ll need longer exposures. To freeze the bustle of the city, opt for faster speeds.
  • ISO: To keep images noise-free, aim for ISO 100-400. Only increase the ISO in situations where light is limited and using a tripod isn’t feasible.

Timing is Everything

  • Blue Hour: This magical time, either before sunrise or after sunset, provides a serene blue tint to the sky, making city lights truly pop.
  • Golden Hour: Occurring shortly after sunrise or just before sunset, this time bathes the city in a warm and soft light, perfect for capturing the city’s glow.
  • Night: As cities come alive with lights, shooting at night can showcase the city’s vibrant nocturnal personality.

Pro Tips for Exceptional Cityscapes

  • Bracketing: This involves taking several shots of the same scene at different exposures. Later, these can be blended in post-processing to achieve a balanced and detailed image, also known as High Dynamic Range (HDR) imaging.
  • Focusing in Low Light: When the camera struggles to autofocus in dim settings, switch to manual focus. Using the Live View mode, zoom in on a well-defined part (like a building’s edge) and adjust the focus manually.
  • Depth of Field: If your scene includes a prominent foreground element, like a statue or fountain, consider focus stacking. This technique involves taking multiple shots with different focus points and merging them in post-production to achieve an image that’s sharp from front to back.

Cityscape photography, like all art forms, thrives on experimentation. While these guidelines provide a solid starting point, the true essence and vibe of a city can best be captured when photographers bring their unique perspective and creativity into play. So, head out, explore the urban wilderness, and most importantly, enjoy the process of immortalizing cityscapes. Happy shooting!

Balance and Visual Weight in Landscape Photography

Landscape photography is all about capturing the essence of a place and evoking emotion in the viewer. One of the most effective ways to achieve this is by understanding and using the principles of balance and visual weight. These concepts help the photographer create harmonious compositions that captivate the viewer’s attention.

1. Understanding Balance

Balance in a photograph refers to the distribution of visual elements, ensuring that no one part of the image overwhelms another. This creates a sense of equilibrium, where the viewer feels at ease when looking at the photograph.

There are two main types of balance:

  • Symmetrical Balance: This occurs when both halves of an image mirror each other. Think of reflection shots, where a mountain is reflected perfectly in a still lake.
  • Asymmetrical Balance: This is achieved when different elements on either side of an image have equal visual weight but are not identical. For instance, a large tree on one side might be balanced by a cluster of smaller trees on the other.

2. Grasping the Concept of Visual Weight

Visual weight refers to the ability of an element within an image to draw the viewer’s attention. Factors that contribute to an element’s visual weight include:

  • Size: Larger objects typically have more visual weight than smaller ones.
  • Contrast: An element that contrasts with its surroundings, either in color, tone, or texture, will stand out.
  • Placement: Elements placed towards the center tend to feel heavier than those at the edges.
  • Complexity: Detailed or complex subjects can draw more attention than simpler ones.

3. Tips for Achieving Balance with Visual Weight

  • Rule of Thirds: Place main subjects on the intersections of the dividing lines. This naturally achieves balance in many scenes.
  • Use Leading Lines: Paths, rivers, or shadows can guide the viewer’s eyes through the frame, balancing out elements of visual weight.
  • Incorporate Negative Space: The empty space can balance a prominent subject, preventing it from overwhelming the image.
  • Pay Attention to Natural Symmetry: Reflections, shadows, and formations can provide natural ways to balance a photo.

4. The Intentional Imbalance

There are moments when an intentional imbalance can be powerful. By making one element overwhelmingly dominant, photographers can evoke feelings of loneliness, awe, or vulnerability. However, it’s essential to use this technique judiciously to avoid confusing the viewer.

Conclusion

Understanding balance and visual weight is crucial for creating compelling landscape photographs. By mastering these concepts, you’ll be better equipped to guide your viewer’s eye through your image, telling a more engaging story about the scene you’ve captured. Like all rules in art, once you understand them thoroughly, don’t be afraid to break them creatively to achieve the mood or message you’re aiming for in your work.

Focus Stacking