Capturing the Beauty of Wildlife
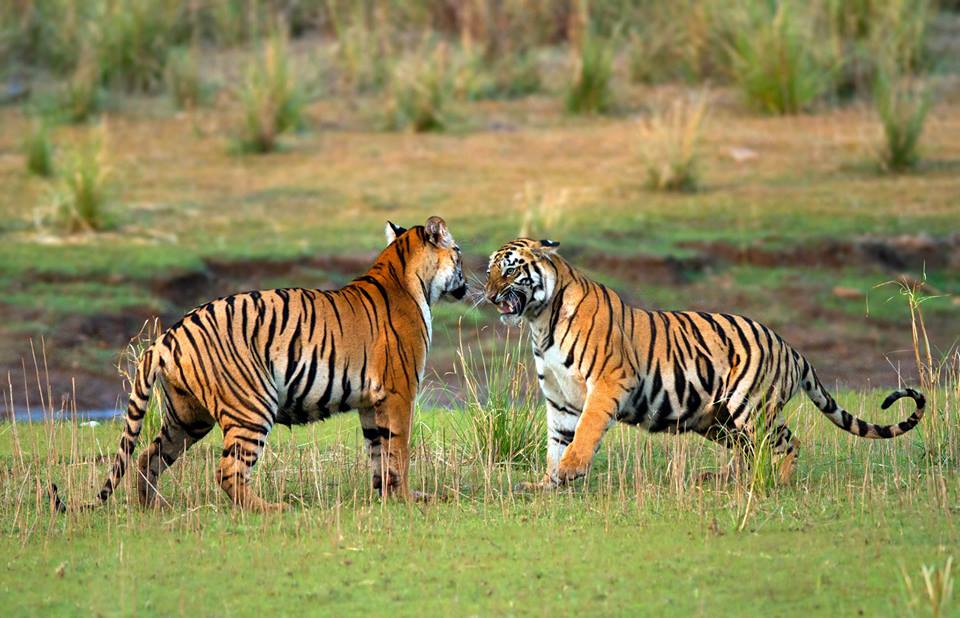
Wildlife photography is a captivating art that allows us to
witness and appreciate the stunning beauty of animals in their natural
habitats. From the powerful grace of a lion on the prowl to the delicate
fluttering of a butterfly’s wings, wildlife photography gives us a glimpse into
the extraordinary world of animals that we may not otherwise have the opportunity
to experience.

Through the lens of a skilled wildlife photographer, we are
transported into the heart of nature, where every click captures a moment
frozen in time. The vibrant colors, intricate patterns, and raw emotions
conveyed by these images evoke a sense of wonder and awe, reminding us of the
incredible diversity and harmony of life on our planet.

The challenge of wildlife photography lies in capturing
these fleeting moments with precision and artistry. It requires a deep
understanding of animal behavior, patience, and the ability to adapt to
ever-changing conditions. A skilled wildlife photographer must immerse
themselves in the natural environment, observing and anticipating the movements
and interactions of the animals they seek to capture.

The beauty of wildlife photography lies not only in the
final image but also in the stories it tells. Each photograph has the power to
narrate the struggle for survival, the tenderness of family bonds, or the sheer
majesty of a creature in its element. These images create a connection between
the viewer and the subject, fostering a sense of empathy and appreciation for
the natural world.

In the age of digital photography, the opportunities for
wildlife photographers are vast. With advancements in technology, we can now
capture wildlife in high resolution, bringing out every detail and texture. The
ability to freeze motion, coupled with the vast range of lenses and equipment
available, allows photographers to experiment with different angles,
perspectives, and compositions, resulting in truly breathtaking images.

Yet, despite the advancements in technology, it is important
to remember that wildlife photography is about more than just technical
prowess. It requires a deep respect for the animals and their habitats. Ethical
considerations, such as maintaining a safe distance, avoiding disturbance, and
leaving no trace, are fundamental in wildlife photography.

By capturing the beauty of wildlife through the lens,
photographers have the opportunity to educate, inspire, and advocate for the
preservation of our natural world. These images serve as a reminder of the
delicate balance of ecosystems and the importance of conservation efforts. They
ignite a sense of wonder and curiosity in people of all ages, fostering a
connection between humanity and the magnificent creatures we share the planet
with.

Wildlife photography is a powerful medium that enables us to appreciate and preserve the beauty of the natural world. Through skilled observation, patience, and technical expertise, photographers are able to capture extraordinary moments that convey the essence of wildlife. These images serve as a testament to the diversity, resilience, and wonder of the animal kingdom, inspiring us to protect and cherish the incredible creatures we share our planet with.

Understanding Composition: Building Stronger Images

Composition is a fundamental aspect of photography that can make or break an image. It is the art of arranging elements within the frame to create a visually appealing and impactful photograph. A well-composed image grabs the viewer’s attention, guides their eyes, and tells a compelling story. In this article, we will explore the key principles of composition and how they can help you build stronger images.

One of the fundamental principles of composition is the rule of thirds. Imagine dividing your frame into a grid of nine equal sections with two horizontal and two vertical lines. The rule of thirds suggests placing your subject or key elements along these lines or at the intersections. This creates a sense of balance and visual interest, making the image more engaging to the viewer.

Leading lines are another powerful compositional tool. They are lines or shapes that guide the viewer’s eyes into the image, drawing attention to the main subject. Leading lines can be found in various forms such as roads, rivers, fences, or even architectural elements. By incorporating leading lines into your composition, you can create a sense of depth and add a dynamic quality to your image.

Consider the concept of negative space when composing your images. Negative space refers to the empty or unoccupied areas in your photograph. By purposefully incorporating negative space, you give your subject room to breathe and create a sense of simplicity and minimalism. This can help draw attention to the subject and convey a specific mood or emotion.

The concept of symmetry and balance is also important in composition. Symmetry occurs when elements in an image are evenly distributed, creating a sense of harmony. It can be found in natural or man-made structures, reflections, or patterns. Balanced composition creates a pleasing visual experience, making the image feel stable and satisfying to the viewer.

When composing your images, pay attention to the placement of the main subject or focal point. Placing the subject off-center, following the rule of thirds, often creates a more dynamic and visually pleasing composition. This technique adds visual tension and draws the viewer’s eyes into the frame.

In addition to these principles, consider the use of framing techniques to enhance your composition. Frames can be created by natural elements like arches, doorways, or tree branches, or even by deliberately using objects within the scene. Framing adds depth and layers to the image, drawing attention to the subject and creating a sense of context.

Experimentation is key when it comes to composition. Don’t be afraid to break the rules and explore unconventional approaches. Photography is an art form, and sometimes the most impactful images are the ones that challenge the norm and surprise the viewer.

Understanding composition is crucial for building stronger and more impactful images. By applying principles such as the rule of thirds, leading lines, negative space, symmetry, and balance, you can create visually appealing photographs that captivate the viewer’s attention. Remember to experiment, trust your instincts, and continue honing your compositional skills. With practice, you will develop a keen eye for composition and elevate your photography to new heights.

The Power of Light: Exploring Different Lighting Techniques in Photography

Light plays a crucial role in photography, influencing the mood, tone, and overall impact of your images. By understanding and utilizing various lighting techniques, you can take your photography to new heights. In this blog, we will explore different lighting techniques in photography and how they can enhance your work.

1. Natural Light Photography:

Natural light is readily available and offers a soft, flattering quality to your images. Capture the warm, golden hues of the sunrise or sunset during the magical golden hours. Experiment with the direction of light to create depth and dimension in your compositions. Remember to pay attention to the quality and angle of the light to achieve the desired mood.

2. Backlighting:

Backlighting involves positioning your subject against a light source, such as the sun or a bright background. This technique creates a striking halo effect, highlighting the edges of your subject and adding a sense of depth. Use backlighting to create dramatic silhouettes that evoke mystery and intrigue in your images.

3. Fill Light:

In situations where the natural light creates harsh shadows, adding fill light can help balance the exposure. Fill light refers to an additional light source, such as a reflector or artificial light, that fills in the shadows and softens the overall lighting. Reflectors are particularly useful in outdoor photography, allowing you to bounce light onto your subject and adjust the color temperature for added warmth or coolness.

4. Side Lighting:

Side lighting involves placing the light source to the side of your subject, creating a play of light and shadow. This technique adds texture and dimension to your images, accentuating contours and details. Experiment with the angle and intensity of side lighting to achieve the desired effect, especially in portraits or subjects with interesting textures.

5. Low-Key and High-Key Lighting:

Low-key lighting creates a moody and dramatic atmosphere by using predominantly dark tones and strong contrasts between light and shadow. High-key lighting, on the other hand, employs bright and evenly lit scenes with minimal shadows, resulting in a light and airy atmosphere. Both techniques can be achieved using natural or artificial light sources, adding visual impact to your photographs.

6. Artificial Lighting:

Artificial lighting, such as studio strobes, continuous lights, or speedlights, provides complete control over the intensity, direction, and quality of light. This versatility is especially useful in controlled environments like studios or indoor settings. Experiment with different lighting setups, modifiers, and techniques to unleash your creativity and achieve your desired vision.

Understanding and utilizing different lighting techniques in photography can transform your images and enhance their storytelling ability. Whether you embrace natural light or explore the possibilities of artificial lighting, each technique offers a unique way to manipulate light and create captivating compositions. Experiment, practice, and continuously refine your understanding of lighting to take full advantage of its power in your photography. By mastering different lighting techniques, you can elevate your work and create images that leave a lasting impact on viewers.

Adjusting Photo Exposure Levels on an iPhone

Exposure is another important iPhone camera feature that can be very helpful once you know how to use it.

Exposure refers to the brightness of a photo.

An under-exposed photo looks too dark, while an over-exposed photo looks too bright.

A well-exposed photo will have great color and detail.
 
So how do you control exposure in the iPhone Camera app?

When you tap to set focus, the camera automatically sets the exposure (brightness) of the photo. It sets the exposure level based on the area you tap.

If you tap a bright area of the scene, the bright parts will be correctly exposed with plenty of color and detail. So in a landscape scene, you can avoid the sky being over-exposed by tapping an area of bright sky.
But keep in mind that the darker areas of the scene may appear under-exposed (which can actually look good if you want your subject to appear as a silhouette).

If you tap a dark area, the camera exposes for the dark parts of the scene. In other words, you’ll see color and detail in the dark areas of the image. However, the brighter areas, such as the sky, may appear over-exposed (as shown below).
Look at the examples below. Tapping to set focus on different parts of the scene has a big effect on exposure.
But you might not want the focus and exposure points to be the same. For example, you might want to focus on a subject in the foreground while exposing for the sky.

That’s not a problem! The iPhone provides an easy way to adjust exposure after setting the focus point.

After tapping to set focus, simply swipe up or down to adjust the exposure(brightness). Swipe up to make the image brighter or down to make it darker.

When the exposure levels look good, tap the shutter to take a photo.

Using Long Exposures in Landscape Photography

Have you looked at some of those amazing long exposure landscapes and thought that they are something very difficult to create? Long exposure photographs, of course, require a lot of effort, thought and planning put into them, but they are not so complicated as you think.

So, what is so different about long exposure landscape images? They are not static like those images you take using a faster shutter speed, but are dynamic in the sense they capture movement showing what has happened in a landscape over a period of time. It could be from a few seconds to minutes or even hours.

They are not static like those images you take using a faster shutter speed, but are dynamic in the sense they capture movement showing what has happened in a landscape over a period of time. It can be from a few seconds to minutes or even hours

Remember the three Ps. Practice and Patience along with good Planning are very important for creating some compelling long exposure landscape images. Here are some quick tips for you to get started.

Look out for a good location. Long exposure photography is where you capture movement. So look for places where there are natural moving elements like waves, waterfalls, rivers, fog, clouds, etc. Make sure you have some static elements like mountains, trees or rocks in the frame so that the movement makes sense and gives a meaning to the image.

The best time to shoot for longer exposures is the blue hour or golden hour. This is to get some beautiful colors in the sky and light on the elements. However, you can also use ND filters of varying strengths to extend your shutter speed and capture more movements.
Check out your composition. When framing moving elements, just like you would do for a landscape image, carefully choose a foreground, middle ground, and background to create powerful compositions. The composition should lead the viewer into the image and keep them hooked. When capturing cloud movement, look for the direction in which they move and frame the scene accordingly to get a visually appealing shot.
Gear and settings. Since you are dealing with longer shutter speed, you will need a camera that lets you shoot in manual mode, especially one with bulb mode for very long exposures. You will also need a wide angle lens, a sturdy tripod, and a remote shutter release to avoid any shake or vibration. Use the lowest ISO possible and aperture between f8 and f11 for sharper noise-free images.

With long exposure landscapes, the look and feel of the image depends on the shutter speed and the speed with which the elements in the frame move. So try various shutter speeds for capturing different amounts of movement in the image and choose what works best for you.

Shoot raw. This will help you work with so much data while post-processing. Raw captures a lot more information in the file than jpeg and let’s you do more in post-production without introducing unwanted “artifacts” that can ruin the image.

Now, these are the very basics of getting into long exposure landscape photography